Spring Planting Projects That Teach Life Cycles and Patience
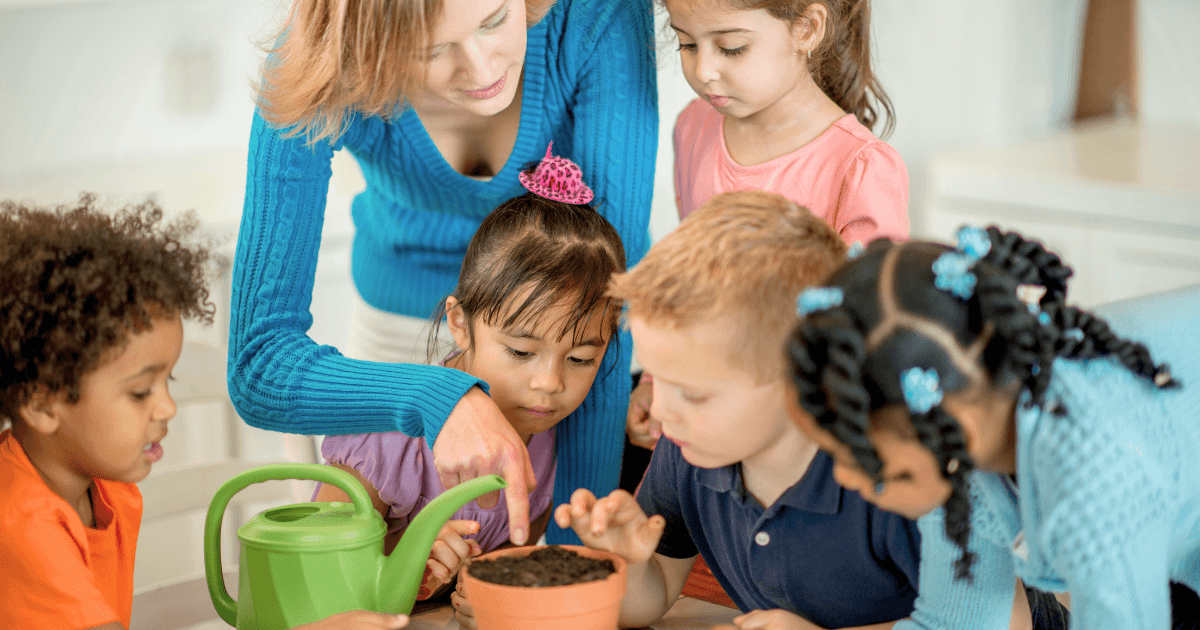
As the frost retreats and the first hints of green emerge, spring offers the perfect opportunity to engage children in one of nature’s most powerful lessons: the journey from seed to plant. Spring planting projects do more than beautify spaces—they provide living laboratories where children witness transformation, practice patience, and develop a deeper connection to the natural world.
According to the National Wildlife Federation, garden-based learning improves academic achievement, enhances social development, and fosters environmental stewardship. Perhaps most importantly in our instant-gratification culture, planting projects teach the invaluable virtue of patience—a skill increasingly recognized as essential for long-term success and well-being.
Let’s explore spring planting projects that bring these lessons to life, whether you’re a teacher, parent, or youth program leader.
The Educational Power of Planting
Before diving into specific projects, it’s worth understanding the rich learning opportunities that planting activities provide:
As The Gardner School notes, “Gardening provides hands-on learning experiences that teach curiosity, resilience, and wonder” while engaging children’s senses and natural curiosity.
Seed Starting Projects: First Lessons in Life Cycles
1. Transparent Seed Viewers
Materials:
Clear plastic cups or CD cases
Paper towels or cotton balls
Various seeds (beans, peas, sunflowers)
Water
Observation journals
Rulers
The Project:
Line the container with damp paper towels or cotton balls
Place seeds between the clear wall and the paper towel
Keep them moist but not soaking wet
Place in a warm location with indirect light
Observe daily changes, measuring growth, and recording observations
Teaching Opportunities:
Visible root and shoot development
The role of water in germination
Different germination rates among seed types
Measurement and data collection
Patience Factor: Medium (3-10 days to see significant changes)
2. Sprout House Gardens
Materials:
Lima beans or other large seeds
Ziplock bags
Paper towels
Water
Markers for decorating
The Project:
Dampen paper towels and place in bags
Position seeds along one side of the bag
Hang bags in a window using tape
Decorate around the bags to create “houses” with the sprouting seeds as “hair”
Observe as roots grow down and shoots grow up
Teaching Opportunities:
Directional growth (geotropism and phototropism)
Parts of a seedling (seed coat, cotyledon, root, shoot)
Daily documentation of changes
Creative expression through decoration
Patience Factor: Low to Medium (2-5 days to see sprouting)
Curriculum Castle recommends this activity as particularly engaging for younger children, noting that “Students can grow plants in the classroom as a hands-on science lesson” that makes abstract concepts concrete.
3. Seed Dissection Laboratory
Materials:
Large soaked seeds (lima beans work well)
Magnifying glasses
Tweezers
Paper towels
Diagram of seed parts
Notebooks for recording observations
The Project:
Soak seeds overnight to soften
Carefully split open the seeds along the natural seam
Use magnifying glasses to identify parts (seed coat, embryo, cotyledon)
Draw and label observations in notebooks
Compare different types of seeds
Teaching Opportunities:
Anatomy of seeds
Function of different seed parts
Scientific observation and recording
Comparison and classification
Patience Factor: Low (immediate exploration with pre-soaked seeds)
Container Gardens: Watching the Full Cycle
1. Pizza Garden in a Pot
Materials:
Large circular container
Potting soil
Seeds or seedlings: tomatoes, basil, oregano, peppers
Plant markers
Watering can
Observation journals
The Project:
Fill the container with potting soil
Divide the “pizza” into sections
Plant different pizza-related herbs and vegetables in each section
Create plant markers identifying each plant
Care for the garden and document growth
Eventually, harvest ingredients for a pizza celebration
Teaching Opportunities:
Different growth rates and needs of various plants
The connection between agriculture and food
Long-term care and maintenance
Celebration of accomplishment and harvest
Patience Factor: High (2-3 months from planting to harvest)
2. Life Cycle in a Jar
Materials:
Clear glass jars
Potting soil
Fast-growing seeds (radishes, lettuce, beans)
Water
Growth chart templates
Markers or colored pencils
The Project:
Layer soil in clear jars
Plant seeds near the edge so roots will be visible
Water appropriately and place them in suitable light
Observe and document the entire life cycle from germination to flowering
Create a visual growth chart tracking changes over time
Teaching Opportunities:
Complete plant life cycle
Root development and function
Effects of light, water, and temperature
Data collection and visual representation
Patience Factor: Medium to High (3-6 weeks to complete life cycle, depending on plant type)
3. Butterfly Garden Containers
Materials:
Container with drainage
Potting soil
Seeds or plants that attract butterflies (milkweed, zinnias, marigolds)
Butterfly identification cards
Journals for recording butterfly visitors
The Project:
Research plants that attract butterflies in your region
Plant appropriate seeds or seedlings in containers
Care for plants as they grow
Observe and document butterfly visitors
Learn about butterfly life cycles alongside plant growth
Teaching Opportunities:
Plant-animal relationships and pollination
Butterfly life cycles parallel plant development
Habitat creation and ecological connections
Responsible environmental stewardship
Patience Factor: High (1-2 months for plants to mature and attract butterflies)
Indoor/Outdoor Connection Projects
1. Seedling Nursery to Garden Transfer
Materials:
Seed starting trays or recycled containers
Seeds appropriate for your growing zone
Potting soil and garden soil
Garden space or larger containers
Transplanting tools
Growth journals
The Project:
Start seeds indoors according to the recommended timing for your region
Care for seedlings, documenting growth stages
Prepare the outdoor space as the weather permits
Teach proper transplanting techniques
Transfer seedlings to the garden, continuing observation
Teaching Opportunities:
Planning and timing in gardening
Indoor vs. outdoor growing environments
Proper techniques for transplanting
Weather patterns and seasonal changes
Patience Factor: High (several weeks indoors plus continued growth outdoors)
As Around the Kampfire explains, this process helps children “record changes, make predictions, and measure growth” as they experience the full journey from seed to garden.
2. Regrowable Vegetable Project
Materials:
Vegetable scraps that can regrow (lettuce bottoms, green onion roots, carrot tops)
Small containers or jars
Water or soil, depending on the vegetable type
Measuring tools
Observation charts
The Project:
Collect appropriate vegetable scraps
Place in water or soil according to type
Observe initial regrowth indoors
Transfer to soil outdoors when appropriate
Compare growth rates and patterns in different environments
Teaching Opportunities:
Plant regeneration capabilities
Resource conservation and sustainability
Comparison of growing conditions
Measurement and documentation
Patience Factor: Low to Medium (visible results within days, but complete growth takes weeks)
3. Three Sisters Garden
Materials:
Space for an outdoor garden plot
Corn, bean, and squash seeds
Garden tools
Cultural information about Three Sisters planting
Growth tracking materials
The Project:
Learn about the Native American tradition of Three Sisters planting
Prepare soil and create mounds according to traditional methods
Plant corn first, then beans and squash as corn grows
Observe how the three plants support each other
Document growth and interdependence
Teaching Opportunities:
Cultural heritage and agricultural history
Plant relationships and companion planting
Sustainable growing practices
Seasonal cycles and timing
Patience Factor: Very High (full-season project with staged planting)
Quick-Result Projects for Instant Engagement
While patience is a valuable lesson, sometimes you need quick results to maintain interest, especially with younger children:
Patience Factor: Very Low (3-7 days from planting to harvest)
2. Grass Heads
Materials:
Old nylon stockings
Grass seed
Potting soil
Small cups or pots
Decorative materials (googly eyes, markers)
Child-safe scissors
The Project:
Fill the toe of a nylon stocking with grass seed and soil
Tie off to create a “head” shape
Decorate with eyes and features
Place in a cup with water touching the bottom
Watch “hair” grow, then give haircuts as needed
Teaching Opportunities:
Seed germination basics
Creative expression
Care and maintenance
Cause and effect relationships
Patience Factor: Low (grass typically sprouts within 3-5 days)
3. Speedy Sprout Jars
Materials:
Glass jars
Sprouting seeds (alfalfa, mung beans, lentils)
Cheesecloth or sprouting lids
Rubber bands
Water
Tasting charts
The Project:
Place seeds in jars with water to soak overnight
Drain and rinse, covering with cheesecloth secured by rubber bands
Rinse 2-3 times daily
Observe changes each day
Harvest when sprouts reach the desired length
Taste and use in recipes
Teaching Opportunities:
Germination without soil
Importance of cleanliness in food growing
Daily care responsibilities
Nutrition and food preparation
Patience Factor: Low (3-5 days from start to harvest)
I’m The Chef Too highlights that activities like these “allow children to observe the transformation of seeds into seedlings, illustrating plant life cycles” while providing nearly immediate gratification.
Enhancing Learning Through Documentation
Regardless of which planting projects you choose, documentation amplifies the learning experience:
1. Life Cycle Journals
Create dedicated journals where children record observations using:
Dated entries with measurements
Drawings of different growth stages
Pressed leaf or flower samples when appropriate
Predictions and questions
Reflections on changes observed
2. Digital Time-Lapse Photography
Use technology to capture growth that might otherwise be too gradual to notice:
Set up a camera or phone to take daily photos from the same angle
Compile images into a time-lapse video
Review the accelerated growth process
Discuss observations that might have been missed in real-time
3. Growth Measurement Charts
Create visual representations of plant progress:
Measure height at regular intervals
Count new leaves or branches
Graph changes over time
Compare growth rates between different plants
Analyze factors that might influence growth rates
Adapting for Different Ages and Settings
These projects can be modified for various age groups and learning environments:
For Preschoolers (Ages 3-5)
Focus on sensory experiences and simple observations
Use larger seeds that are easier to handle
Emphasize daily care routines
Keep projects short-term with visible results
Use picture-based documentation methods
For Elementary Students (Ages 6-10)
Incorporate more detailed observation and recording
Add scientific vocabulary and concepts
Include measurement and data analysis
Explore relationships between plants and the environment
Extend to full life cycle projects
For Middle School Students (Ages 11-14)
Add experimental variables and controls
Include more complex scientific concepts
Connect to broader environmental issues
Incorporate technology for documentation
Develop independent research extensions
Cultivating Patience Through Planting
The true magic of spring planting projects lies in their ability to naturally teach patience—a skill that can’t be rushed. Here are strategies to enhance this aspect:
1. Create Anticipation Calendars
Mark important milestones on a calendar to help children visualize the waiting period and celebrate each stage of development.
2. Compare Growth Rates
Plant fast-growing and slow-growing species side by side, and discuss why they have different timelines.
3. Highlight the Rewards of Waiting
Emphasize how patience leads to greater rewards, whether beautiful flowers, tasty vegetables, or complete scientific understanding.
4. Share Growth Stories
Use books, videos, and personal anecdotes about plant growth to reinforce that good things take time.
5. Celebrate Milestones
Acknowledge each stage of the plant life cycle with simple celebrations, reinforcing that the journey itself has value.
Conclusion: Seeds of Lifelong Learning
Spring planting projects offer far more than science lessons—they plant seeds of character development, environmental stewardship, and lifelong learning. Through the simple act of nurturing a seed into a plant, children experience the profound satisfaction of patient care and attention.
As they witness the miracle of growth unfold—sometimes quickly, sometimes slowly—they develop not just knowledge about life cycles, but a deeper appreciation for the rhythms of the natural world. In our fast-paced society, few lessons could be more valuable.
Whether you have access to a garden plot, a sunny windowsill, or just a few clear containers, these spring planting projects can transform understanding and instill the patience that will serve children well throughout their lives.
What spring planting projects have you tried with children? How have you observed them developing patience through gardening activities? Share your experiences in the comments below!