STEM for Little Hands: Simple Science Experiments for 3-5 Year Olds
Young children are natural scientists—curious, questioning, and eager to understand how the world works. Their endless “why” questions aren’t just adorable; they’re the foundation of scientific thinking! By introducing simple STEM (Science, Technology, Engineering, and Math) experiments to preschoolers, we nurture this natural curiosity while building essential skills for future learning.
The best part? You don’t need fancy equipment or a science degree to create meaningful STEM experiences for your little ones. This collection of experiments uses everyday materials you likely already have at home, with clear, simple steps perfect for short attention spans.
Why STEM for Preschoolers Matters
According to Brightwheel, early STEM activities help children develop seven critical thinking skills:
Observing
Comparing
Classifying
Measuring
Communicating
Inferring
Predicting
These foundational skills extend far beyond science—they’re essential for reading comprehension, mathematical thinking, and social problem-solving. Plus, early positive experiences with STEM help children see themselves as capable scientists and engineers, regardless of gender or background.
Getting Started: Tips for Success
Before diving into experiments, keep these tips in mind:
Focus on process, not results: The goal isn’t a perfect outcome but the experience of questioning, predicting, and discovering.
Use scientific language: Introduce simple terms like “predict,” “observe,” and “experiment” naturally during activities.
Ask open-ended questions: “What do you think will happen if…?” or “What do you notice?” rather than yes/no questions.
Follow their lead: If your child shows particular interest in one aspect of an experiment, take time to explore that further.
Document discoveries: Take photos or help children draw what they observed to reinforce learning.
Now, let’s explore some age-appropriate experiments organized by scientific concept!
Water Wonders
1. Sink or Float
Materials:
Clear container of water
Collection of small objects (cork, metal spoon, plastic toy, rock, feather, etc.)
Optional: Paper to record predictions
Steps:
Show your child the objects and ask which ones they think will sink and which will float.
Test each object by placing it in water.
Sort objects into “sinkers” and “floaters” groups.
The Science: Objects denser than water sink, while those less dense float. This experiment introduces the concept of density in a hands-on way.
Questions to Ask:
“Why do you think this floated/sank?”
“Can you find something else that might float/sink?”
“What happens if we put the floaters in a different position?”
2. Magic Milk Colors
Materials:
Shallow dish
Whole milk (works better than skim)
Food coloring (several colors)
Dish soap
Cotton swab
Steps:
Pour milk into the dish to cover the bottom.
Add drops of different food colors spread out across the surface.
Dip the cotton swab in dish soap.
Touch the soapy swab to the milk surface and watch the colors dance!
The Science: Dish soap breaks up the fat molecules in milk, creating movement that carries the food coloring in swirling patterns. This demonstrates surface tension and molecular interactions.
Questions to Ask:
“What happens when the soap touches the milk?”
“Why do you think the colors are moving?”
“What happens if we add another drop of soap in a different spot?”
3. Rain Cloud in a Jar
Materials:
Clear jar or glass
Shaving cream
Food coloring mixed with water
Dropper or pipette
Steps:
Fill the jar about ¾ full with water.
Spray shaving cream on top to form a “cloud.”
Drip colored water onto the cloud.
Watch as the “rain” eventually falls through the cloud into the water below.
The Science: This mimics how real rain forms. The shaving cream represents clouds, and as they become saturated with water (the food coloring), they can’t hold any more, so the water falls as rain.
Questions to Ask:
“What happens as we add more colored water?”
“How is this like real rain?”
“What do you think would happen if we used less shaving cream?”
Amazing Air
4. Balloon Rocket
Materials:
String (about 10-15 feet)
Straw
Tape
Balloon
Two chairs or other supports
Steps:
Thread the string through the straw.
Tie the string between two chairs, keeping it tight.
Blow up the balloon (but don’t tie it).
Tape the balloon to the straw, then pinch it closed.
Release the balloon and watch it zoom along the string!
The Science: This demonstrates Newton’s Third Law of Motion—for every action, there’s an equal and opposite reaction. The air rushing out of the balloon (action) propels the balloon forward (reaction).
Questions to Ask:
“What makes the balloon move?”
“What happens if we blow up the balloon more or less?”
“How could we make the balloon go faster?”
5. Dancing Tissue Paper
Materials:
Tissue paper cut into small pieces
Balloon
Wool fabric or hair (optional)
Steps:
Cut tissue paper into small pieces (about 1-inch squares).
Blow up the balloon and tie it.
Rub the balloon against hair or wool fabric to create static electricity.
Hold the balloon near the tissue paper pieces and watch them “dance” toward the balloon!
The Science: Rubbing creates static electricity on the balloon’s surface, which attracts the lightweight tissue paper. This introduces the concept of electrical charges.
Questions to Ask:
“Why do you think the paper moves toward the balloon?”
“What else could we try to pick up with our charged balloon?”
“Does it work better with some materials than others?”
Colorful Chemistry
6. Fizzy Color Mixing
Materials:
Baking soda
Vinegar
Food coloring
Muffin tin or small containers
Droppers or pipettes
Steps:
Place a spoonful of baking soda in each section of the muffin tin.
Add different food colors to separate containers of vinegar.
Using droppers, add colored vinegar to the baking soda and watch the colorful fizzing reaction!
Observe how colors mix when different colored vinegars are added to the same section.
The Science: Baking soda (a base) and vinegar (an acid) react to form carbon dioxide gas, creating bubbles. This introduces basic chemistry concepts and explores color mixing.
Questions to Ask:
“What happens when we add the vinegar to the baking soda?”
“What new color do we make when we mix blue and yellow?”
“Can you hear or feel anything during the reaction?”
7. Color-Changing Flowers
Materials:
White carnations or celery stalks with leaves
Food coloring
Clear cups or jars
Water
Steps:
Fill cups with water and add different food colors to each.
Trim flower stems or celery stalks and place in colored water.
Observe over several hours or overnight.
For advanced exploration, split the stem halfway and place each half in a different color.
The Science: Plants draw water up through their stems through capillary action. As the colored water moves up, it becomes visible in the petals or leaves, demonstrating how plants transport water.
Questions to Ask:
“How do you think the color gets into the flower?”
“Why do plants need to drink water?”
“What do you think will happen if we split the stem into two colors?”
Magnificent Magnets
8. Magnetic Treasure Hunt
Materials:
Various small objects (paper clips, coins, aluminum foil, plastic toys, etc.)
Magnet
Sorting tray or circles drawn on paper
Steps:
Gather a collection of items, some magnetic and some not.
Ask your child to predict which items the magnet will attract.
Test each item with the magnet.
Sort into “magnetic” and “not magnetic” groups.
The Science: Only certain metals (those containing iron, nickel, or cobalt) are attracted to magnets. This activity introduces the magnetic properties of materials.
Questions to Ask:
“What do all the magnetic items have in common?”
“Can the magnet work through other materials?” (Try paper or thin plastic)
“How strong is the magnet? How many paper clips can it hold at once?”
9. Magnetic Painting
Materials:
Metal baking tray
Paper cut to fit tray
Magnetic marble or a small round magnet
Washable paint in small containers
Larger magnet (to control from underneath)
Steps:
Place paper on the metal tray.
Dip the magnetic marble in paint.
Place the marble on the paper.
Move the larger magnet underneath the tray to control the marble and create designs.
The Science: Magnetic force works through certain materials, allowing the marble to move without direct contact. This demonstrates magnetic fields creatively.
Questions to Ask:
“How can we make the marble move faster or slower?”
“What happens when we use two marbles at once?”
“Can you make specific shapes or patterns?”
Fascinating Physics
10. Ramp Races
Materials:
Cardboard or foam board to create ramps
Books or blocks to prop up ramps
Various small cars or balls
Measuring tape
Timer (optional)
Steps:
Create ramps of different heights or angles.
Race cars or roll balls down the ramps.
Measure how far they travel.
Experiment with different surfaces on the ramps (smooth, rough, bumpy).
The Science: This introduces concepts of gravity, friction, and momentum. Steeper ramps create faster movement, while different surfaces affect how objects move.
Questions to Ask:
“Which ramp makes the car go fastest? Why?”
“Does a heavier car go farther than a lighter one?”
“What happens if we make the ramp bumpy?”
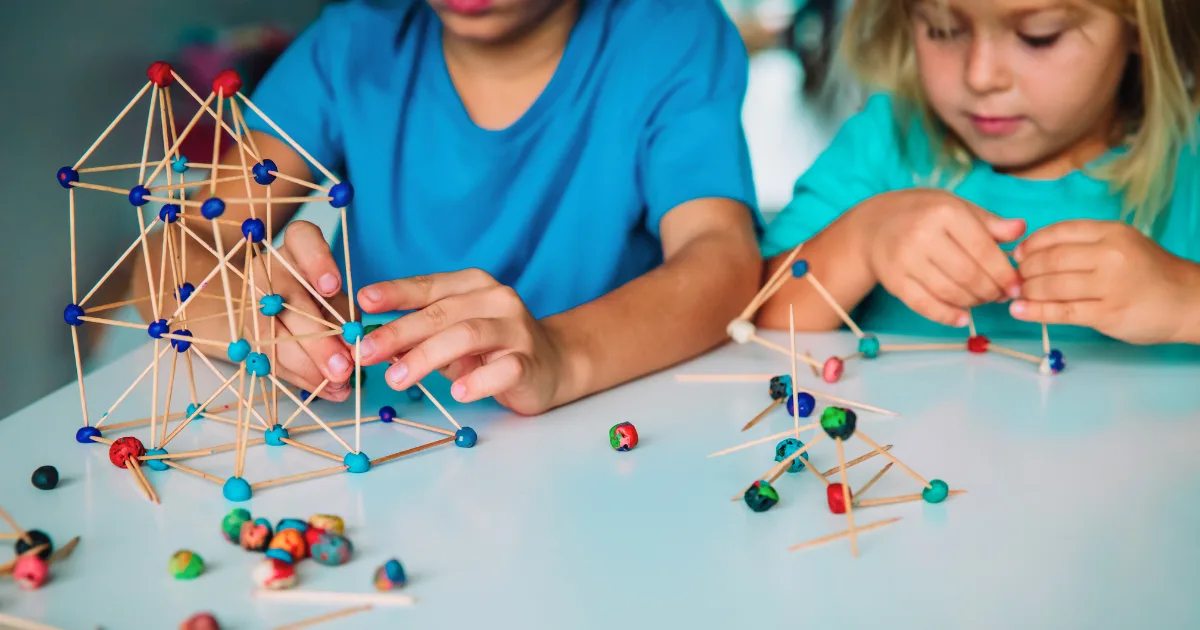
11. Building Block Balance
Materials:
Building blocks (wooden blocks work well)
Small toys or objects of varying weights
Steps:
Challenge your child to build the tallest tower possible.
Then try building a bridge between two stacks of blocks.
Test how much weight the bridge can hold before collapsing.
Experiment with different bridge designs.
The Science: This introduces structural engineering concepts like balance, stability, and weight distribution. Children learn through trial and error.
Questions to Ask:
“What makes your tower stable or wobbly?”
“How could we make the bridge stronger?”
“What shapes seem to work best for building?”
Sensational Senses
12. Mystery Sound Bottles
Materials:
Several identical containers with lids (plastic bottles or film canisters work well)
Various materials to create sounds (rice, beans, paper clips, sand, etc.)
Tape to secure lids
Steps:
Place different materials in each container.
Secure the lids with tape.
Shake each container to hear the different sounds.
Create matching pairs for a memory-style game.
The Science: This activity develops listening skills and introduces the concept that different materials create different sounds based on their physical properties.
Questions to Ask:
“How would you describe this sound?”
“Can you find two containers that sound the same?”
“What do you think is inside this container?”
13. Scent Matching
Materials:
Small containers with lids (film canisters or spice jars work well)
Cotton balls
Various scents (vanilla extract, lemon juice, peppermint extract, cinnamon, etc.)
Blindfold (optional)
Steps:
Place cotton balls with different scents in containers.
Create duplicate sets for matching.
Have your child smell each container and find the matches.
For older preschoolers, try blindfolded identification.
The Science: This activity develops the sense of smell and introduces the concept that scents are actually tiny particles in the air that our noses detect.
Questions to Ask:
“How would you describe this smell?”
“Does this smell remind you of anything?”
“Which smell is your favorite? Why?”
Outdoor STEM Adventures
14. Nature Scavenger Hunt
Materials:
Paper bags or egg cartons
List of items to find (or pictures for non-readers)
Magnifying glass (optional)
Steps:
Create a simple scavenger-hunt list with items such as “something smooth,” “something that makes noise,” or “something green.”
Explore outdoors to collect or observe the items.
Discuss the properties of each found item.
The Science: This activity develops observation skills and introduces classification based on physical properties. It also connects children with natural materials and environments.
Questions to Ask:
“How did you know this was smooth/rough/etc?”
“Where did you find this item? Why do you think it was there?”
“How are these two items similar or different?”
15. Shadow Investigations
Materials:
Sunny day
Chalk (if on pavement)
Various objects
Steps:
Observe shadows at different times of day.
Trace shadows with chalk and return later to see how they’ve moved.
Create shadow puppets with hands or objects.
Experiment with making shadows longer or shorter by moving objects.
The Science: This introduces concepts about light, the sun’s movement, and how shadows form when objects block light.
Questions to Ask:
“Why do you think shadows change during the day?”
“How can we make our shadow bigger or smaller?”
“What happens to your shadow when you jump?”
Making STEM Part of Everyday Life
The most powerful STEM learning happens when it’s integrated into daily routines rather than treated as special “science time.” Here are simple ways to incorporate STEM thinking throughout your day:
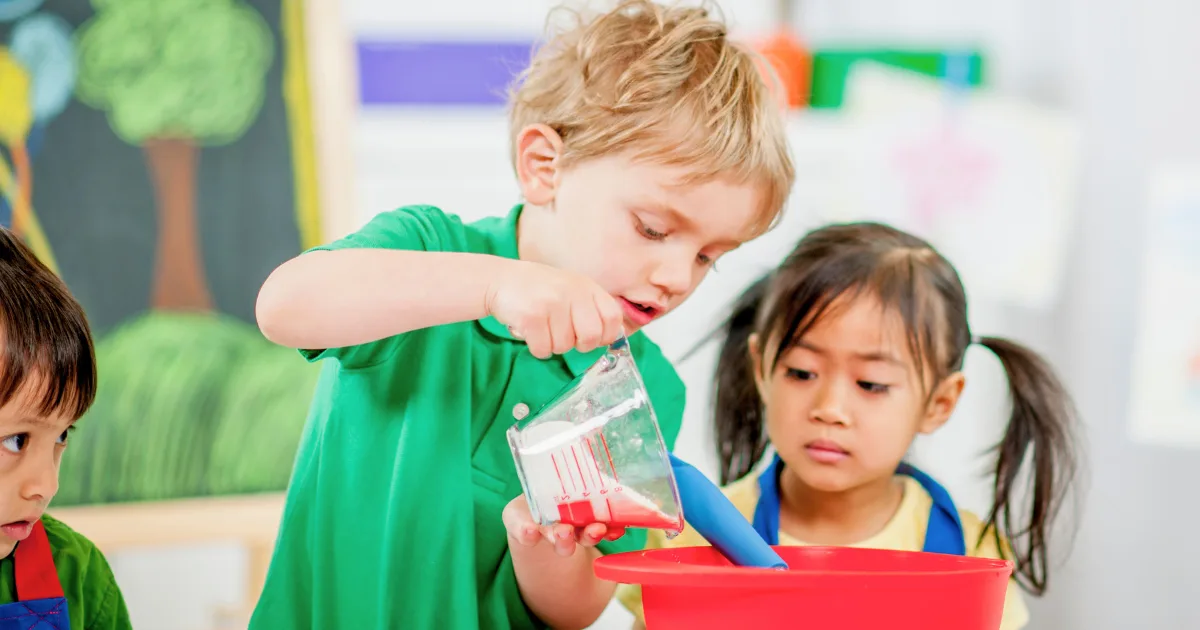
In the kitchen: Measure ingredients together, talk about how heat affects food, and observe how some ingredients dissolve while others don’t.
Bath time: Explore which toys sink or float, experiment with pouring and measuring water, and observe how soap affects water.
Outdoor play: Notice weather patterns, observe insects and plants, collect and sort natural materials, and build with sticks and stones.
Cleanup time: Sort toys by category, count items as you put them away, and problem-solve how to fit everything in the storage container.
Books to Extend STEM Learning
Pair these experiments with great children’s books to deepen understanding:
“Ada Twist, Scientist” by Andrea Beaty
“The Most Magnificent Thing” by Ashley Spires
“What Do You Do With an Idea?” by Kobi Yamada
“Rosie Revere, Engineer” by Andrea Beaty
“The Water Princess” by Susan Verde
Remember: It’s About the Process
The most important thing to remember is that preschool STEM isn’t about memorizing facts or getting “right” answers. It’s about developing a scientific mindset—one that embraces curiosity, isn’t afraid of failure, and sees problems as exciting challenges to solve.
When experiments don’t work as expected (and some won’t!), that’s not a failure—it’s an authentic scientific experience. Real scientists have unexpected results all the time! These moments provide valuable opportunities to model resilience and creative thinking:
“That didn’t work the way we thought it would! How interesting!”
“I wonder why that happened? What could we try differently?”
“Scientists often have to try many times before they find what works.”
As you explore these activities with your preschooler, you’re not just teaching them about water, air, or magnets—you’re helping them develop a lifelong approach to learning that will serve them well beyond early childhood.
Safety First
While these experiments are designed to be safe for preschoolers, always keep these precautions in mind:
Always supervise children during experiments
Discuss which materials are safe to touch, taste, or smell
Be cautious with small items that could be choking hazards
Store potentially harmful ingredients (like cleaning products) out of reach
Modify activities as needed for your child’s developmental level
Adapting for Different Ages and Abilities
These experiments can be easily modified to meet children where they are developmentally:
For Younger Preschoolers (3 years):
Focus more on sensory exploration and simple cause-and-effect relationships
Provide more guidance and demonstration
Keep activities shorter (5-10 minutes)
Emphasize observation over explanation
For Older Preschoolers (4-5 years):
Encourage more detailed predictions and observations
Introduce simple recording methods (drawing what they see)
Ask more “why” questions
Allow more independent exploration
For Children with Different Abilities:
Consider sensory sensitivities when selecting activities
Provide adaptive tools as needed (larger handles, stabilized containers)
Break down steps into smaller components
Focus on strengths while supporting areas of challenge
Documenting the Learning Journey
Creating a simple “science journal” can enhance the learning experience and create a wonderful keepsake. This doesn’t need to be elaborate:
Take photos of experiments in progress
Help children dictate their observations or questions
Encourage drawings of what they observed
Save samples when possible (pressed leaves, color mixing samples)
Review the journal periodically to reinforce concepts and vocabulary
Final Thoughts: Growing Little Scientists
By providing these hands-on STEM experiences during the preschool years, you’re laying the groundwork for scientific thinking, problem-solving skills, and a positive attitude toward learning. You’re showing children that science isn’t just something in textbooks—it’s all around us in our everyday world.
The questions, observations, and discoveries your child makes today are the building blocks for tomorrow’s innovations. So grab those measuring cups, magnets, and food coloring—your little scientist is ready to explore!
What simple STEM experiments have engaged your preschooler? Share your experiences and questions in the comments below!