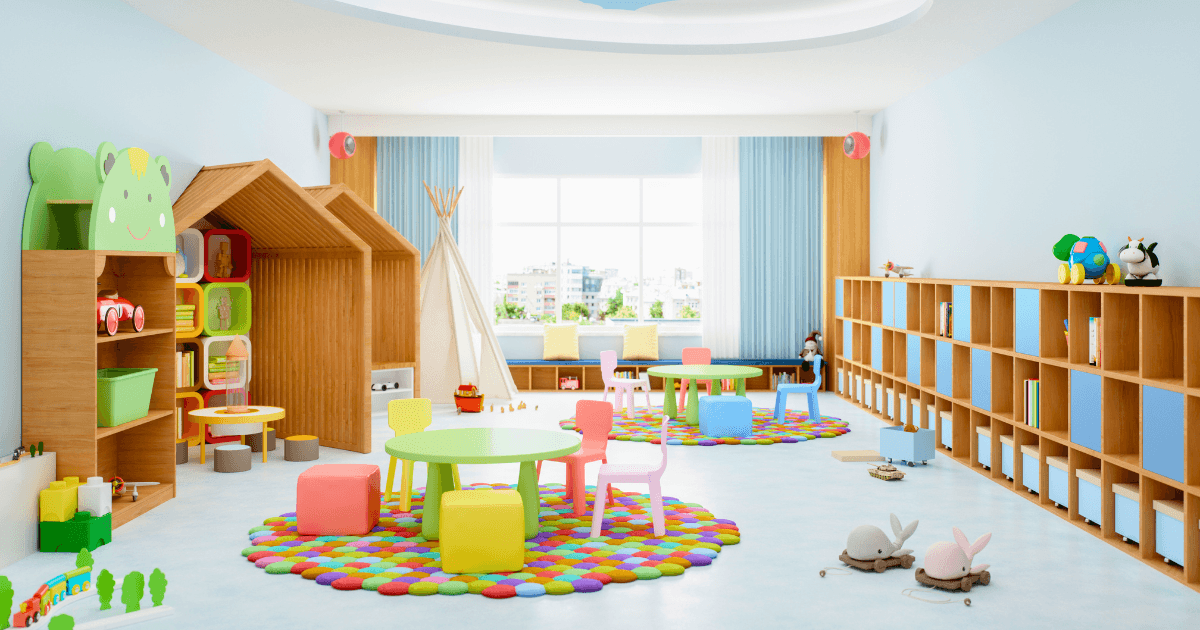
STEM on a Budget: Preschool Science Activities Using Dollar Store Items
Science, Technology, Engineering, and Math (STEM) education forms the foundation for critical thinking, problem-solving, and innovation—skills our children will need throughout their lives. But introducing STEM concepts doesn’t require expensive kits or specialized equipment. In fact, some of the most engaging and effective preschool science activities can be created using items found at your local dollar store.
As early childhood educators and researchers increasingly emphasize the importance of STEM exposure during the formative preschool years, parents and teachers are looking for accessible, affordable ways to bring these concepts to life. Dollar stores have emerged as treasure troves of potential science materials, offering everything from basic supplies to unexpected items that can spark scientific discovery.
In this comprehensive guide, we’ll explore:
- Why dollar store STEM activities are ideal for preschoolers
- Essential dollar store items to stock your preschool STEM supply kit
- 15 engaging science experiments organized by concept
- Tips for maximizing learning during dollar store STEM activities
- How to extend the learning beyond the initial experiment
Let’s dive into the world of budget-friendly STEM exploration that will captivate your preschooler’s curiosity without breaking the bank!
Why Dollar Store STEM Activities Work for Preschoolers
Before we get to the specific activities, let’s understand why dollar store materials are particularly well-suited for preschool science exploration:
Affordability Encourages Experimentation
When materials are inexpensive, children feel more freedom to experiment without fear of “wasting” expensive supplies. This creates an environment where trial and error—the heart of the scientific method—is encouraged rather than restricted.
According to a 2025 study from the Early Childhood Education Journal, children who engage with low-cost materials show greater willingness to take risks and try multiple approaches to problem-solving compared to those using more expensive materials.
Familiar Materials Build Confidence
Preschoolers often feel more comfortable exploring science concepts with familiar, everyday objects rather than specialized equipment. Using items they recognize from their daily lives helps them make connections between scientific principles and their own experiences.
Sustainability Lessons Come Built-In
Using everyday materials for science experiments teaches children about resourcefulness and creative repurposing—important sustainability concepts they’ll carry forward. When children see that science doesn’t require special equipment, they learn that scientific thinking can happen anywhere, anytime.
Accessibility for All
When STEM activities rely on affordable materials, they become accessible to all families and classrooms regardless of budget constraints. This democratization of science education helps ensure that all children have opportunities to develop critical thinking skills.
Essential Dollar Store Items for Your Preschool STEM Supply Kit
Before diving into specific activities, let’s assemble a basic STEM supply kit using dollar store finds. Having these materials on hand will prepare you for numerous experiments and spontaneous scientific explorations:
Basic Supplies
- Plastic containers: Various sizes for holding materials, mixing, and observing
- Measuring cups and spoons: For precise measurements and introducing mathematical concepts
- Pipettes or eyedroppers: For liquid transfer and fine motor development
- Magnifying glasses: For close observation of materials and processes
- Craft sticks: For mixing, building, and creating structures
- Straws: For building, blowing, and exploring air pressure
- Aluminum foil: For creating surfaces, boats, and electrical experiments
- Plastic cups: For holding materials, building, and sound experiments
- Paper plates and bowls: For sorting, mixing, and containing experiments
Consumable Materials
- Baking soda: For chemical reactions
- Vinegar: Partner to baking soda for acid-base reactions
- Food coloring: For tracking movement in liquids and color mixing
- Salt: For crystallization and density experiments
- Sugar: For crystallization and dissolving experiments
- Dish soap: For bubble experiments and surface tension demonstrations
Tools and Containers
- Ice cube trays: For freezing, sorting, and mold-making
- Plastic bins: For sensory experiences and containing messier experiments
- Spray bottles: For plant care and exploring water pressure
- Flashlights: For shadow experiments and exploring light
- Kitchen sponges: For absorption experiments and water play
- Balloons: For air pressure and static electricity experiments
Craft and Building Materials
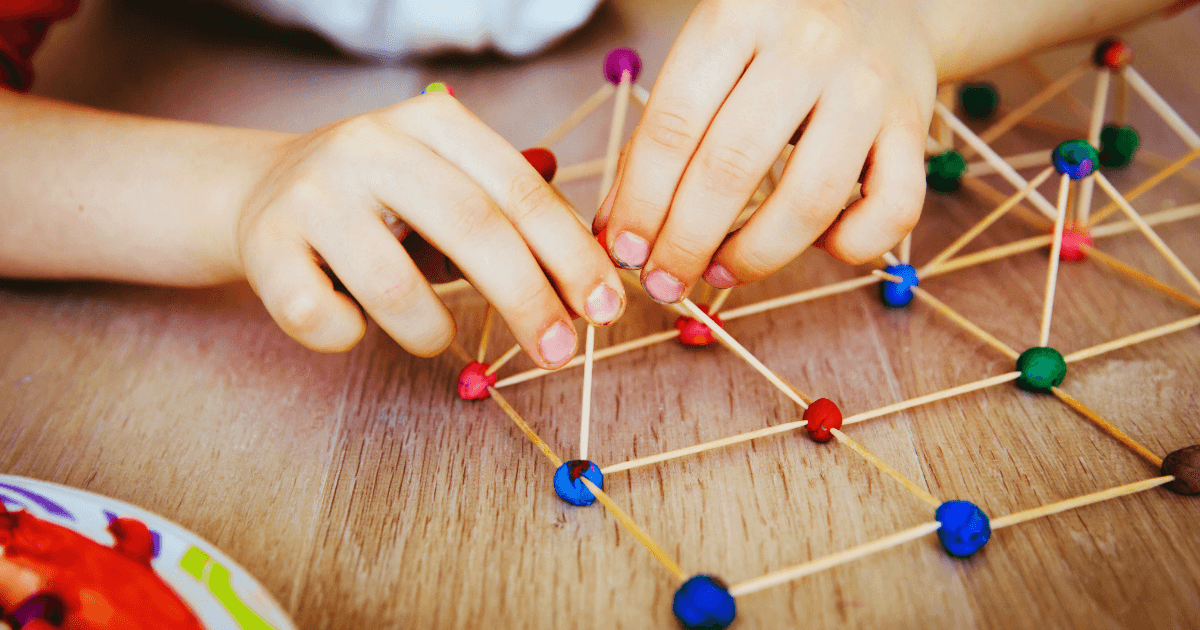
- Pipe cleaners: For creating structures and models
- Pom-poms: For sorting, counting, and texture experiments
- Clothespins: For fine motor activities and creating simple machines
- Cotton balls: For absorption experiments and cloud models
- Popsicle sticks: For building structures and simple machines
Having these materials organized and accessible creates a “STEM station” that allows for both planned activities and spontaneous scientific exploration.
15 Engaging Dollar Store STEM Activities for Preschoolers
Now, let’s explore specific activities organized by scientific concept. Each of these experiments uses primarily dollar store materials and is designed to engage preschoolers while introducing fundamental STEM concepts.
Chemistry Explorations
1. Fizzy Rainbow Eruptions
Materials:
- Baking soda
- Vinegar
- Food coloring
- Small plastic containers
- Pipettes or eyedroppers
- Tray or cookie sheet
Instructions:
- Place small containers on a tray.
- Add a few tablespoons of baking soda to each container.
- Add different food coloring to separate small cups of vinegar.
- Using pipettes, let children drop colored vinegar onto the baking soda and observe the colorful fizzing reactions.
The Science: This classic acid-base reaction creates carbon dioxide gas, causing the fizzing eruption. Preschoolers observe chemical reactions, color mixing, and cause-and-effect relationships.
Learning Extensions: Ask children to predict what will happen when they add more or less vinegar. Introduce vocabulary like “reaction,” “fizz,” and “gas.”
2. Magic Milk Color Explosion
Materials:
- Shallow dish or plate
- Whole milk
- Food coloring
- Dish soap
- Cotton swabs
Instructions:
- Pour a thin layer of milk onto a plate.
- Add drops of different food colors spread out across the milk’s surface.
- Dip a cotton swab in dish soap.
- Touch the soapy swab to the milk’s surface and watch the colors explode and swirl.
The Science: Dish soap breaks down the fat molecules in milk, creating movement as the molecules rearrange. This demonstrates surface tension, molecular interactions, and fluid dynamics.
Learning Extensions: Try the experiment with different types of milk (skim, 2%, whole) to compare results. Discuss why the colors move differently with different milk types.
3. Homemade Slime Investigation
Materials:
- Clear school glue
- Liquid starch or contact lens solution with baking soda
- Food coloring
- Small containers for mixing
- Craft sticks for stirring
- Optional: glitter, small beads, or sequins
Instructions:
- Pour glue into a container.
- Add food coloring and mix.
- Gradually add liquid starch or contact solution, stirring continuously until slime forms.
- Once formed, children can stretch, bounce, and explore the properties of their slime.
The Science: This activity demonstrates polymer science. The glue contains polymers (long chains of molecules) that cross-link when the activator (starch or borax) is added, creating a non-Newtonian fluid that has properties of both solids and liquids.
Learning Extensions: Explore how temperature affects slime’s properties by placing it in the refrigerator or warming it in hands. Discuss states of matter and how slime doesn’t fit neatly into solid or liquid categories.
Physics and Engineering Adventures
4. Pom-Pom Catapult
Materials:
- Plastic spoons
- Rubber bands
- Popsicle sticks
- Pom-poms
- Tape
- Small cups or targets
Instructions:
- Stack several popsicle sticks and wrap a rubber band around one end.
- Insert another popsicle stick between the stack, creating a lever.
- Secure a plastic spoon to the end of the lever with tape and rubber bands.
- Place a pom-pom in the spoon, press down, and release to launch.
The Science: This simple machine demonstrates potential and kinetic energy, leverage, and projectile motion.
Learning Extensions: Experiment with different launching angles and forces. Set up targets at various distances and predict which ones they can hit.
5. Marble Run Engineering
Materials:
- Paper towel or toilet paper tubes
- Masking tape
- Marbles
- Scissors
- Wall or flat surface
Instructions:
- Cut paper tubes in half lengthwise to create troughs.
- Tape tubes to a wall or flat surface, creating a pathway for marbles.
- Include curves, drops, and tunnels in your design.
- Test by dropping marbles from the top and observing their path.
The Science: This activity explores gravity, momentum, and the principles of engineering design. Children learn through trial and error how to create functional pathways.
Learning Extensions: Challenge children to create specific features like loops or jumps. Introduce vocabulary like “gravity,” “momentum,” and “friction.”
6. Balloon-Powered Car
Materials:
- Plastic bottle caps (for wheels)
- Cardboard rectangle
- Balloon
- Plastic straw
- Tape
- Skewer or thin dowel (for axles)
Instructions:
- Create a simple car by attaching bottle cap wheels to a cardboard rectangle using skewers as axles.
- Tape a straw to the top of the car.
- Attach a balloon to the straw.
- Inflate the balloon through the straw, pinch to hold air, place the car on the floor, and release.
The Science: This demonstrates Newton’s Third Law of Motion: for every action, there is an equal and opposite reaction. As air rushes out of the balloon in one direction, it propels the car in the opposite direction.
Learning Extensions: Experiment with different balloon sizes or multiple balloons. Modify the car design to see how changes affect distance and speed.
Earth and Environmental Science
7. Mini Greenhouse Garden
Materials:
- Clear plastic cups or containers with lids
- Potting soil
- Bean, pea, or grass seeds
- Spray bottle
- Paper towels
- Markers for labeling
Instructions:
- Placedamp paper towels or soil in clear containers.
- Add seeds along the edge where they’ll be visible.
- Close the container to create a greenhouse effect.
- Place in a sunny location and observe daily changes.
The Science: This activity demonstrates plant germination, the greenhouse effect, and the water cycle within a closed environment.
Learning Extensions: Create observation journals where children draw what they see each day. Compare plants grown in closed containers to those in open air.
8. Weather in a Jar
Materials:
- Clear jar with lid
- Shaving cream
- Food coloring mixed with water
- Pipette or eyedropper
Instructions:
- Fill the jar about 3/4 full with water.
- Add a layer of shaving cream on top to represent clouds.
- Drop colored water onto the “cloud” using a pipette.
- Watch as the colored water eventually gets heavy enough to “rain” through the cloud.
The Science: This models how rain forms in clouds. As water droplets in clouds become heavier, they eventually fall as precipitation.
Learning Extensions: Connect to real weather observations. Create a weather journal to record daily conditions and compare to the model.
9. Erosion Exploration
Materials:
- Aluminum foil trays or plastic containers
- Soil
- Small rocks and sticks
- Spray bottles filled with water
- Small cups for pouring
Instructions:
- Create a landscape in the tray using soil, rocks, and sticks.
- Predict what will happen when water is added.
- Use spray bottles or small cups to add water from different heights and angles.
- Observe how water moves soil and creates channels.
The Science: This demonstrates erosion and how water shapes landscapes over time.
Learning Extensions: Create different landscapes and compare erosion patterns. Add barriers to see if they can prevent erosion.
Biology and Life Science
10. Butterfly Life Cycle in a Bag
Materials:
- Ziplock sandwich bags
- Green paper leaves
- Black pipe cleaners
- Red pom-poms
- Yellow and black construction paper
- Glue stick
Instructions:
- Create the stages of butterfly metamorphosis using craft supplies:
- Egg: Small yellow dots on a leaf
- Caterpillar: Green pipe cleaner and pom-poms
- Chrysalis: Green folded paper
- Butterfly: Paper butterfly
- Place each stage in a section of the ziplock bag.
- Seal and hang in a window or on a wall.
The Science: This activity teaches the life cycle of butterflies and the concept of metamorphosis.
Learning Extensions: Read books about butterflies and discuss other animals that undergo metamorphosis. Compare to the life cycles of other animals.
11. Five Senses Exploration Station
Materials:
- Small containers with lids
- Various scented items (cinnamon, vanilla, lemon)
- Textured items (sandpaper, fabric, cotton balls)
- Items that make different sounds (rice, bells, paper)
- Flashlights and colored cellophane
- Blindfold (optional)
Instructions:
- Create stations for each sense:
- Smell: Containers with different scents
- Touch: Box with textured items
- Hearing: Containers that make different sounds when shaken
- Sight: Flashlights with colored cellophane
- Taste: (Optional) Simple safe items like salt, sugar, lemon juice
- Guide children through exploring each station, using descriptive language.
The Science: This teaches sensory perception and how we gather information about our world through our senses.
Learning Extensions: Create a sensory scavenger hunt around the house or classroom. Discuss how some animals have different sensory abilities than humans.
12. DIY Stethoscope
Materials:
- Plastic funnel
- Rubber or plastic tubing
- Electrical or duct tape
- Scissors
Instructions:
- Connect the narrow end of the funnel to one end of the tubing.
- Secure with tape to make it airtight.
- Use the funnel end to listen to heartbeats by placing it against the chest.
The Science: This demonstrates sound conduction and introduces basic human anatomy.
Learning Extensions: Compare heart rates before and after exercise. Discuss the function of the heart and how it pumps blood throughout the body.
Light and Color Investigations
13. Rainbow Prism Exploration
Materials:
- Clear plastic cups or containers
- Flashlights
- Paper
- Water
- Small mirrors
Instructions:
- Fill containers with water.
- Position near a window with direct sunlight, or use flashlights.
- Use mirrors to direct light through the water onto a white surface.
- Observe the rainbows created as light separates into component colors.
The Science: This demonstrates light refraction and the visible light spectrum.
Learning Extensions: Explore other ways to create rainbows. Discuss why we see rainbows after it rains.
14. Shadow Investigation Station
Materials:
- Flashlight
- Various objects of different shapes and transparency
- White paper or wall
- Optional: colored cellophane
Instructions:
- Darken the room.
- Shine the flashlight on objects and observe the shadows they cast.
- Experiment with distance between light, object, and surface.
- Add colored cellophane over the flashlight to explore colored shadows.
The Science: This explores how light travels, how shadows form, and how transparent, translucent, and opaque materials interact with light.
Learning Extensions: Create shadow puppets and tell stories. Observe outdoor shadows at different times of day to see how they change in length and direction.
15. Color Mixing Eyedroppers
Materials:
- Clear plastic cups or ice cube trays
- Food coloring (primary colors)
- Eyedroppers or pipettes
- Water
- White paper towels
Instructions:
- Fill containers with water.
- Add primary colors (red, blue, yellow) to separate containers.
- Using eyedroppers, mix colors in empty containers or on paper towels.
- Create a color wheel by documenting discoveries.
The Science: This demonstrates color theory and how primary colors combine to create secondary colors.
Learning Extensions: Predict what colors will result from different combinations. Relate to rainbows and prisms by discussing how white light contains all colors.
Maximizing Learning During Dollar Store STEM Activities
The materials may be inexpensive, but the learning opportunities are invaluable. Here’s how to ensure your preschoolers get the most educational benefit from these activities:
Use Scientific Vocabulary
Introduce age-appropriate scientific terms during activities. Words like “predict,” “observe,” “experiment,” “hypothesis,” and “conclusion” can become part of your preschooler’s vocabulary naturally through repeated use in context.
Follow the Scientific Method (Simplified)
Even with preschoolers, you can introduce a simplified version of the scientific method:
- Ask a question
- Make a guess (hypothesis)
- Test it out (experiment)
- What happened? (observations)
- Why did it happen? (conclusions)
Using consistent language around these steps helps children internalize the process of scientific inquiry.
Ask Open-Ended Questions
Rather than explaining everything, ask questions that prompt thinking:
- “What do you think will happen if…?”
- “What do you notice about…?”
- “How could we change this to make it…?”
- “Why do you think that happened?”
These questions encourage critical thinking and help children develop their own explanations.
Document the Process
Create simple ways for preschoolers to record their observations:
- Take before and after photos
- Draw pictures of what they observed
- Create simple charts with happy/sad faces for predictions that were correct/incorrect
- Record their verbal observations and play them back
Documentation helps children reflect on their learning and creates a record of their scientific thinking.
Connect to Real-World Examples
Help children see how the concepts in these activities connect to their everyday experiences:
- Link the fizzy eruptions to baking and cooking
- Connect the weather in a jar to actual rainstorms
- Relate shadow play to shadows they see outside
These connections help cement learning and make science relevant to their lives.
Organizing Your Dollar Store STEM Supplies
Keeping materials organized makes science activities more accessible and less overwhelming. Here are some tips for organizing your dollar store STEM collection:
Create Themed STEM Bins
Organize materials into clear plastic bins based on scientific themes:
- Chemistry bin (baking soda, vinegar, food coloring, containers)
- Building bin (popsicle sticks, pipe cleaners, tape, cardboard)
- Nature exploration bin (magnifying glasses, containers, tweezers)
- Water play bin (droppers, funnels, containers, food coloring)
Label bins with both words and pictures so preschoolers can help with setup and cleanup.
Make Activity Cards
Create simple cards with pictures of the activities and basic instructions. Store these with the relevant materials so you can quickly set up an activity when interest arises.
Repurpose Dollar Store Organizers
Use dollar store storage solutions to organize smaller items:
- Shower caddies for frequently used tools
- Ice cube trays for sorting small items
- Plastic baskets for categorizing materials
- Over-the-door shoe organizers for storing supplies in clear pockets
Rotate Materials
Keep engagement high by rotating which materials are accessible. This prevents overwhelm and makes old materials feel new again when reintroduced.
Extending the Learning: From One-Time Activities to Ongoing Exploration
While one-time experiments are fun, the real power of STEM education comes from ongoing exploration and building connections between concepts. Here’s how to extend the learning:
Create STEM Journals
Provide simple notebooks where children can draw their observations or dictate their thoughts for you to write down. Reviewing these journals periodically helps children see patterns and connections in their learning.
Set Up a Wonder Wall
Designate a space where questions that arise during experiments can be recorded. These questions can inspire future explorations and show children that science is about continuous inquiry, not just finding one right answer.
Develop Multi-Day Investigations
Some concepts benefit from exploration over time:
- Seed growth can be observed daily for weeks
- Weather observations can become a daily routine
- Freezing and melting experiments can be repeated with different variables
These longer investigations help children understand processes that aren’t instantaneous.
Connect to Children’s Literature
Pair STEM activities with related picture books. For example:
- Read “The Very Hungry Caterpillar” alongside the butterfly life cycle activity
- Explore “The Snowy Day” when investigating states of matter
- Connect “Rainbow Fish” to light and color experiments
Literature provides context and reinforces scientific concepts through storytelling.
Addressing Common Challenges with Dollar Store STEM Activities
Even with simple materials, challenges can arise. Here are solutions to common issues:
Challenge: Short Attention Spans
Solution: Break activities into smaller steps, allow for movement breaks, and follow the child’s lead. If interest wanes, it’s okay to put the activity away and return to it later.
Challenge: Messy Experiments
Solution: Embrace the mess as part of the learning process! Use dollar store shower curtains or tablecloths as drop cloths, conduct messier experiments outdoors, and involve children in the cleanup as part of the scientific process.
Challenge: Different Developmental Levels
Solution: Provide multiple entry points for the same activity. Younger children might simply explore the materials, while older preschoolers can make predictions and record observations.
Challenge: Failed Experiments
Solution: Frame “failures” as valuable learning opportunities. Ask, “What did we learn?” and “How could we change our experiment next time?” This builds resilience and authentic scientific thinking.
Safety Considerations for Dollar Store STEM Activities
While dollar store materials are generally safe, it’s important to consider a few precautions:
Supervision is Essential
Always supervise preschoolers during STEM activities, especially those involving small objects, water, or substances like vinegar that could irritate eyes.
Check for Choking Hazards
Be mindful of small items that could pose choking risks for younger children. Modify activities as needed or save certain experiments for when younger siblings are napping.
Use Food-Grade Materials
When activities involve substances that might touch mouths or faces, opt for food-grade materials. For example, use food coloring rather than craft paint for activities where children might put fingers in their mouths.
Have Safety Equipment Available
Keep simple safety equipment on hand:
- Paper towels for spills
- Child-safe scissors
- Protective smocks or old t-shirts
- Non-latex gloves for sensitive skin
Discuss Safety Rules
Establish simple safety rules before beginning experiments, such as:
- We keep materials away from our mouths
- We tell a grown-up if something spills
- We use walking feet around our experiments
- We ask before mixing materials
The Long-Term Impact of Early STEM Exposure
The dollar store STEM activities we’ve explored might seem simple, but their impact on preschoolers’ development can be profound and long-lasting. Research from the Joan Ganz Cooney Center shows that early STEM experiences:
- Build problem-solving skills that transfer to other areas of learning
- Foster positive attitudes toward science and math
- Develop spatial reasoning abilities that predict later math achievement
- Enhance language development through scientific vocabulary and discussions
- Promote critical thinking and questioning habits of mind
Perhaps most importantly, these activities help children see themselves as capable scientists, engineers, and problem-solvers—identities that can inspire lifelong learning and exploration.
Conclusion: The Value Beyond the Price Tag
While the materials for these activities may come with small price tags, the learning opportunities they provide are invaluable. Dollar store STEM activities demonstrate that meaningful science education doesn’t require expensive equipment or specialized knowledge—just curiosity, simple materials, and a willingness to explore alongside your child.
By engaging preschoolers in these budget-friendly STEM explorations, you’re not just keeping them entertained on a rainy afternoon; you’re helping them develop the thinking skills, curiosity, and confidence they’ll need to navigate an increasingly complex world.
So next time you’re at the dollar store, look beyond the obvious. That package of plastic cups isn’t just for drinks—it’s for exploring volume and capacity. Those pom-poms aren’t just craft supplies—they’re for investigating motion and force. With a little creativity and the activities we’ve shared, your dollar store haul can become a treasure trove of scientific discovery for your preschooler.
What dollar store STEM activities have you tried with your preschooler? Share your experiences and ideas in the comments below!