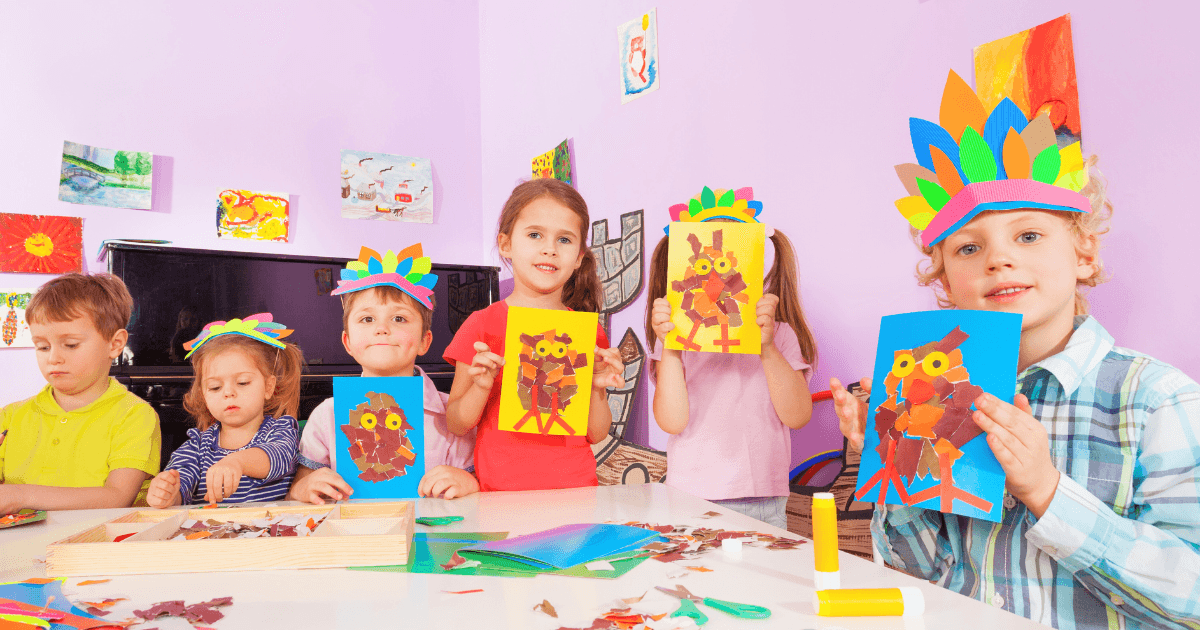
15 Seasonal Preschool Crafts That Teach While They Entertain
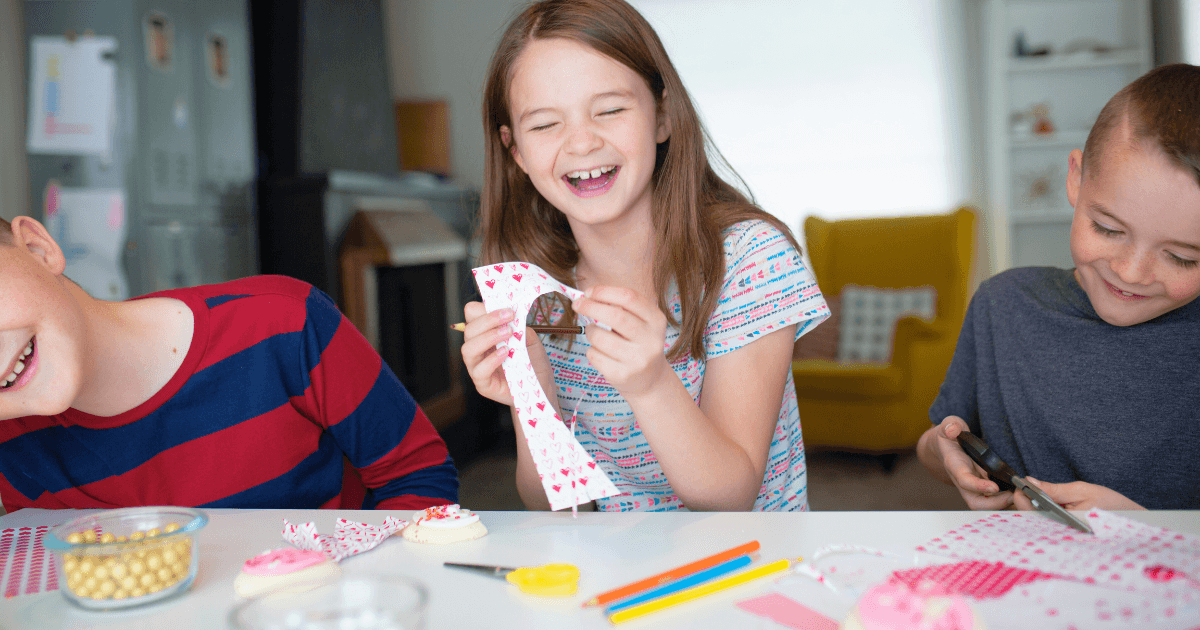
As parents and educators, we’re always on the lookout for activities that captivate preschoolers’ attention while secretly building essential skills. Seasonal crafts offer the perfect solution—they’re timely, engaging, and can be tailored to develop specific abilities. Beyond the immediate joy of creating something beautiful, these crafts lay important foundations for academic success and personal development.
In this comprehensive guide, we’ll explore seasonal craft ideas that do double-duty: entertaining little ones while teaching crucial developmental skills. For each season, we’ll provide easy-to-implement craft ideas, highlight the specific skills they develop, and offer tips for adapting them to different ability levels.
Let’s dive into a year of creative learning through seasonal crafts!
Why Seasonal Crafts Matter: The Educational Benefits
Before jumping into specific craft ideas, let’s understand why seasonal crafts are particularly valuable for preschoolers’ development.
Connecting to the Natural World
Seasonal crafts help children observe and understand the changing world around them. According to early childhood expert Dr. Maria Montessori, connecting learning to the natural environment helps children develop a sense of order and predictability in their world.
“When children create art based on seasonal themes, they’re processing their observations about temperature changes, different types of precipitation, plant life cycles, and animal behaviors,” explains Dr. Rebecca Johnson, early childhood education researcher. “These observations build the foundation for later scientific thinking.”
Developing Essential Skills Through Hands-On Learning
Fine Motor Skills: Cutting, gluing, painting, and manipulating small objects strengthen the hand muscles needed for writing and self-care tasks.
Cognitive Development: Following step-by-step instructions, planning, problem-solving, and making creative choices all exercise important thinking skills.
Language Development: Discussing materials, processes, and finished products builds vocabulary and communication skills.
Social-Emotional Growth: Completing projects builds confidence and self-esteem, while collaborative crafting teaches cooperation and sharing.
Math Concepts: Measuring, counting, recognizing patterns, and understanding shapes are naturally incorporated into many craft activities.
A study from the Center for Early Childhood Education found that preschoolers who engaged in regular craft activities showed significant improvements in fine motor control and visual-spatial skills compared to peers who had fewer creative opportunities.
Now, let’s explore specific craft ideas for each season that harness these benefits while providing hours of entertainment.
Spring Crafts: Celebrating Growth and Renewal
Spring crafts focus on themes of growth, weather changes, and the return of vibrant colors to the natural world.
1. Paper Plate Rainbow with Cotton Ball Clouds
Materials:
Paper plate, cut in half
Cotton balls
Colored paper strips or ribbons
Glue
Scissors
Instructions:
Help your child glue cotton balls along the curved edge of the half paper plate to form clouds.
Cut strips of colored paper in rainbow colors (red, orange, yellow, green, blue, purple).
Have your child arrange and glue the strips in rainbow order from one side of the plate to the other.
Skills Developed:
Color recognition and sequencing: Learning the colors of the rainbow in order
Fine motor skills: Manipulating small cotton balls and paper strips
Weather concepts: Understanding rain and sunshine creates rainbows
Educational Extension: Talk about the science of rainbows while crafting. For older preschoolers, introduce the mnemonic “ROY G BIV” (Red, Orange, Yellow, Green, Blue, Indigo, Violet) to help them remember the rainbow colors.
2. Handprint Flower Bouquet
Materials:
Colored construction paper
Green construction paper for stems
Paint in spring flower colors
Paintbrush
Glue
Scissors
Instructions:
Paint your child’s hand with their choice of flower colors.
Press their hand onto paper, fingers spread, to create “petals” of a flower.
Repeat with different colors if desired.
Cut out the handprints and green stems/leaves.
Arrange and glue onto a background paper to create a bouquet.
Skills Developed:
Body awareness: Understanding how hands can create shapes
Color mixing: Exploring how colors blend when painting hands
Sensory processing: Experiencing the texture of paint on skin
Plant anatomy: Learning about flower parts (petals, stems, leaves)
Educational Extension: Label the parts of the flowers together. For younger children, count the “petals” (fingers). For older children, discuss different types of flowers that bloom in spring.
3. Egg Carton Caterpillar to Butterfly
Materials:
Egg carton (cut into strips of 4-5 cups)
Paint and brushes
Pipe cleaners for antennae
Coffee filters
Washable markers
Spray bottle with water
Glue
Instructions:
Paint the egg carton section to create a caterpillar.
Add pipe cleaner antennae.
A few days later, create butterflies by coloring coffee filters with washable markers.
Lightly spray the coffee filter with water to watch the colors blend.
Once dry, pinch in the middle and secure with a pipe cleaner.
Skills Developed:
Scientific concepts: Understanding metamorphosis and life cycles
Patience: Creating a two-part project over multiple days
Color diffusion: Observing how colors spread when wet
Vocabulary: Learning terms like “chrysalis,” “metamorphosis,” and “transformation”
Educational Extension: Read Eric Carle’s “The Very Hungry Caterpillar” and discuss the butterfly life cycle. For older preschoolers, create a simple diagram showing the four stages of metamorphosis.
Summer Crafts: Exploring Nature and Outdoor Fun
Summer crafts capitalize on abundant natural materials and opportunities for outdoor creativity.
Remove the backing and let your child arrange tissue paper pieces on the sticky side.
Cover with another piece of contact paper to seal.
Punch a hole at the top, thread with a string, and hang in a window.
For wind chimes, hang multiple suncatchers from a stick or hoop.
Skills Developed:
Light and color concepts: Observing how light passes through different materials
Pattern creation: Arranging colors and shapes in pleasing patterns
Sound awareness: Listening to the gentle sounds of wind chimes
Nature appreciation: Incorporating found natural objects
Educational Extension: Discuss how the sun’s position changes throughout the day and how it affects the suncatcher’s appearance. For older children, introduce simple concepts about light refraction.
5. Ice Painting
Materials:
Ice cube tray
Food coloring or liquid watercolors
Popsicle sticks
Thick paper or cardstock
Instructions:
Mix water with different colors of food coloring in each ice cube compartment.
Insert popsicle sticks and freeze.
Once frozen, use the ice cubes as paint by dragging them across paper.
Observe how the melting ice creates unique patterns and color blending.
Skills Developed:
Scientific inquiry: Exploring states of matter (liquid to solid to liquid)
Cause and effect: Seeing how ice melts and leaves color behind
Sensory exploration: Feeling the ice and watching the transformation
Color mixing: Observing how colors blend as ice melts together
Educational Extension: Ask prediction questions such as “What happens when the red and yellow ice cubes melt together?” For older preschoolers, create a simple chart recording how long it takes different-sized ice cubes to melt.
6. Seashell or Nature Collage
Materials:
Sturdy cardboard or canvas
Collection of seashells, pebbles, or other natural items
School glue or low-temperature glue gun (adult use only)
Paint (optional)
Instructions:
Take a nature walk to collect materials, or use seashells from a beach trip.
Arrange items on the base before gluing to create a design.
Secure items with glue.
Optional: Paint around or between natural items to enhance the design.
Skills Developed:
Classification: Sorting materials by type, size, or color
Spatial reasoning: Arranging objects to fit in a defined space
Environmental awareness: Learning about natural objects and their origins
Memory creation: Connecting craft to personal experiences like beach visits
Educational Extension: Create labels or a key identifying the different natural items. For younger children, count the different types of materials. For older children, research where certain shells or plants come from.
Fall Crafts: Celebrating Harvest and Changing Colors
Fall crafts incorporate rich textures and the season’s dramatic color changes.
7. Leaf Rubbings and Prints
Materials:
Collected fall leaves
White paper
Unwrapped crayons
Paint and brushes (for prints)
Paper plates (for prints)
Instructions: For rubbings:
Place leaves vein-side up under paper.
Rub the side of an unwrapped crayon over the paper to reveal leaf shapes and textures.
For prints:
Paint one side of the leaves with fall colors.
Press the painted side onto the paper, then carefully lift to reveal the print.
Continue with different leaves and colors.
Skills Developed:
Observation skills: Noticing different leaf shapes, sizes, and vein patterns
Scientific classification: Identifying different types of leaves and trees
Color recognition: Learning about fall colors and why leaves change
Print concepts: Understanding that objects can create images
Educational Extension: Create a leaf identification guide using the rubbings. For younger children, sort leaves by shape or size. For older children, learn the names of local trees and match leaves to species.
8. Paper Bag Apple Tree
Materials:
Brown paper grocery bag
Green and red construction paper
Scissors
Glue
Brown paint or marker
Instructions:
Cut the bottom from a paper bag and cut vertical strips from the open end up about halfway to create the trunk and branches.
Twist and shape the strips into branches.
Cut leaf shapes from green paper and apple shapes from red paper.
Help your child glue the leaves and apples onto the branches.
Skills Developed:
3D construction: Creating a three-dimensional sculpture from flat materials
Plant biology: Learning about how fruit grows on trees
Seasonal awareness: Understanding harvest time and fall food sources
Scissor skills: Practicing cutting on lines and shapes
Educational Extension: Count the apples together. For younger children, sort apples by size. For older children, introduce concepts about how trees produce fruit and the life cycle of an apple tree.
9. Pumpkin Seed Mosaic
Materials:
Dried pumpkin seeds (cleaned and dried)
Cardboard cut into simple shapes
Paint for seeds (optional)
Glue
Markers (optional)
Instructions:
If desired, paint pumpkin seeds in various colors and allow them to dry.
Draw a simple outline on cardboard (e.g., a pumpkin, leaf, apple).
Have your child glue seeds within the outline to create a mosaic effect.
Add details with markers if desired.
Skills Developed:
Spatial awareness: Arranging small objects to fill a defined space
Pattern creation: Making designs with the seeds
Recycling concepts: Repurposing seeds that would otherwise be discarded
Patience and persistence: Completing a detailed project
Educational Extension: Discuss where seeds come from and their purpose. For younger children, sort seeds by size or color before gluing. For older children, plant some pumpkin seeds to observe germination.
Winter Crafts: Exploring Texture and Light in the Darker Season
Winter crafts often focus on creating light and warmth during the coldest, darkest time of year.
10. Cotton Ball Snowman
Materials:
Blue construction paper
Cotton balls
Black and orange construction paper
Glue
Scissors
Optional: fabric scraps for scarf, buttons, googly eyes
Instructions:
Arrange and glue cotton balls in a snowman shape on blue paper.
Cut small pieces from black paper for eyes, mouth, and buttons.
Cut a small triangle from orange paper for the nose.
Add accessories like a paper or fabric scarf.
Skills Developed:
Size seriation: Arranging cotton balls from large to small
Weather concepts: Learning about snow and how snowmen are made
Shape recognition: Creating circles for the snowman’s body
Creative problem-solving: Figuring out how to create facial features and accessories
Educational Extension: Discuss the states of water (solid, liquid, gas) and what happens to snow as it warms. For younger children, count the cotton balls. For older children, write a story about their snowman.
11. Salt Dough Ornaments
Materials:
2 cups flour
1 cup salt
1 cup warm water
Cookie cutters
Paint
Glitter (optional)
String or ribbon
Straw for making holes
Instructions:
Mix flour, salt, and water to form dough.
Roll out the dough and cut shapes with cookie cutters.
Use a straw to make a hole for hanging.
Bake at 250°F for 2 hours or until hard.
Once cool, paint and decorate.
Thread the ribbon through the hole for hanging.
Skills Developed:
Measurement: Learning about cups and proportions
Physical science: Observing how dough changes when baked
Cultural awareness: Creating decorations for various winter celebrations
Following multi-step processes: Completing a project over multiple sessions
Educational Extension: Use the ornaments to create patterns on a string. For younger children, focus on naming colors and shapes. For older children, create number or letter ornaments to practice recognition.
12. Paper Plate Penguin
Materials:
Paper plates
Black and white construction paper
Orange paper for the beak and feet
Googly eyes or paper eyes
Glue
Scissors
Instructions:
Cut a paper plate in half for the penguin’s body.
Cover most of it with black paper, leaving a white oval for the belly.
Cut wings from black paper and attach.
Add orange feet, a beak, and eyes.
Optional: Add a scarf or hat for a winter touch.
Skills Developed:
Animal habitats: Learning about penguins and where they live
Body awareness: Identifying body parts on animals compared to humans
Cutting skills: Practicing cutting on lines and curves
Spatial reasoning: Placing features in appropriate locations
Educational Extension: Locate Antarctica on a globe or map. For younger children, talk about how penguins stay warm. For older children, compare penguins to other birds and discuss adaptations.
Year-Round Crafts with Seasonal Variations
Some craft concepts work year-round with seasonal adaptations, providing consistency while exploring seasonal changes.
13. Seasonal Handprint Tree
Materials:
Brown paint for trunk/branches
Various colors for seasonal leaves/decorations
Large paper
Paint brushes
Instructions:
Paint the child’s arm and hand brown (the arm is the trunk, the spread fingers are the branches).
Press onto paper to create a tree.
Add seasonal elements by fingerprinting:
Spring: Pink/white blossoms, tiny green leaves
Summer: Full green leaves, maybe small red apples
Fall: Red, orange, yellow, and brown leaves
Winter: White fingerprints for snow, or bare branches with cotton ball snow beneath
Skills Developed:
Seasonal awareness: Understanding how trees change throughout the year
Science concepts: Learning about tree life cycles and seasonal adaptations
Memory and sequencing: Recalling the order of seasonal changes
Color associations: Connecting colors with different seasons
Educational Extension: Create a complete set of four trees showing the full yearly cycle. For younger children, focus on naming the seasons and their characteristics. For older children, discuss why trees lose their leaves and how they survive winter.
14. Seasonal Sensory Bottles
Materials:
Clear plastic bottles with secure lids
Various seasonal fillers:
Spring: Flower confetti, pastel beads, green glitter
Winter: Silver glitter, white pom-poms, blue beads
Water or clear hair gel
Hot glue for sealing (adult only)
Instructions:
Select seasonal items to place in the bottle.
Fill the bottle about 2/3 with water or hair gel.
Add seasonal items.
Secure the lid and seal with hot glue if needed.
Let the child shake and observe.
Skills Developed:
Sensory processing: Watching items move and float
Observation skills: Noticing how different materials interact
Emotional regulation: Using the bottle as a calming tool
Vocabulary development: Describing the movement and appearance of items
Educational Extension: Create a prediction chart about which items will float and which will sink. For younger children, use the bottles during quiet time. For older children, discuss density and why some objects float while others sink.
15. Nature Weaving with Seasonal Findings
Materials:
Cardboard frame with yarn warp (vertical strings)
Seasonal natural items:
Spring: Flower petals, new grass, thin flexible twigs
Fine motor coordination: Manipulating small natural items
Nature identification: Learning the names of various plants and natural objects
Seasonal observation: Noticing what’s available in nature during different seasons
Educational Extension: Create a nature journal documenting what was collected. For younger children, sort materials by type before weaving. For older children, research the names of specific plants and create labels for them.
Making Crafts Developmentally Appropriate
The same craft can often be adapted to suit different developmental levels. Here’s how to modify activities for various ages and abilities:
For Younger Preschoolers (2-3 years)
Simplify steps: Break the craft into fewer, clearer actions
Pre-cut materials: Have shapes already cut out for assembly
Focus on process: Emphasize exploration over finished product
Provide more assistance: Guide little hands for challenging steps
Limit choices: Offer fewer color or material options to prevent overwhelm
For Older Preschoolers (4-5 years)
Add complexity: Include more steps and details
Encourage independence: Demonstrate, then let them try on their own
Introduce scissors skills: Provide opportunities for cutting with supervision
Expand choices: Offer more materials and creative options
Add writing elements: Incorporate name writing or simple labels
For Children with Different Abilities
Sensory sensitivities: Provide alternatives to messy materials like finger paint
Motor challenges: Use adaptive scissors or thicker materials that are easier to manipulate
Attention spans: Break longer projects into multiple sessions
Different learning styles: Incorporate visual, verbal, and hands-on instructions
The Social-Emotional Benefits of Seasonal Crafting
Beyond the cognitive and physical skills developed through crafting, seasonal projects offer significant social-emotional benefits:
Building Confidence and Self-Esteem
Completing a craft project gives children a sense of accomplishment and pride. According to child psychologist Dr. Eileen Kennedy-Moore, “When children create something with their own hands, they develop confidence in their abilities to affect their world.”
This confidence is particularly important during the preschool years when children are developing their sense of competence and industry. Each completed project reinforces the message: “I can do things!”
Processing Seasonal Transitions
Seasonal changes can sometimes be challenging for young children to understand and process. Crafts provide a concrete way to acknowledge and celebrate these transitions.
“Seasonal crafts help children mark time and understand the cyclical nature of the year,” explains early childhood educator Maria Thompson. “This creates a sense of security and predictability in their world, which is especially important for preschoolers who are still developing their understanding of time.”
Creating Family Traditions and Memories
When seasonal crafts become annual traditions, they create lasting memories and a sense of family identity. The handprint ornament made each December or the annual fall leaf collection become touchpoints that children look forward to and remember.
These traditions provide emotional anchors and strengthen family bonds—benefits that extend far beyond the craft table.
Setting Up for Crafting Success
The environment and preparation you provide can make a significant difference in how successful and enjoyable craft time becomes:
Creating a Craft-Friendly Space
Designate a specific area: If possible, have a dedicated space for messy activities.
Protect surfaces: Use washable tablecloths, plastic mats, or newspaper.
Make materials accessible: Store craft supplies at child height in clear containers.
Display finished work: Create a gallery space to showcase completed crafts.
Preparing for the Experience
Gather all materials before starting: Nothing derails a craft session faster than realizing you’re missing a key component.
Dress appropriately: Have craft aprons or use old clothes.
Set clear expectations: Discuss rules about using materials properly.
Have cleaning supplies ready: Keep wipes, paper towels, or a damp cloth nearby.
Managing the Process
Focus on process over product: Avoid showing a “perfect” example that might discourage creativity.
Ask open-ended questions: “What else could we add?” or “How else might we use this material?”
Embrace “mistakes”: Model flexibility by showing how unexpected results can become new opportunities.
Document the experience: Take photos of both the process and the finished product.
Extending the Learning Beyond Craft Time
The educational value of crafts can be amplified when connected to other learning experiences:
Book Connections
Pair crafts with related children’s literature. For example:
Read “The Snowy Day” by Ezra Jack Keats before making cotton ball snowmen
Explore “Leaf Man” by Lois Ehlert before creating leaf rubbings
Share “The Very Hungry Caterpillar” by Eric Carle before making the egg carton caterpillar craft
Use paper plate animals as puppets for storytelling
Incorporate seasonal sensory bottles into a weather station, dramatic play area
Let handprint trees become part of a forest in a small world play setup
Preserving and Displaying Seasonal Creations
Part of the value of seasonal crafts is creating memories. Here are ways to preserve and celebrate children’s creations:
Creating a Seasonal Craft Portfolio
Keep a special folder or box for each season’s crafts
Date each creation and add a brief note about the process
Review previous years’ crafts when the season returns
Digital Documentation
Create a digital photo album of craft projects
Record short videos of your child explaining their creation
Share images (with permission) with family members who live far away
Rotating Seasonal Displays
Designate a special shelf or wall for displaying seasonal crafts
Create a tradition of “switching seasons” in the display area
Involve your child in deciding which pieces to showcase
Conclusion: The Lasting Impact of Seasonal Crafting
Seasonal crafts offer far more than just a way to keep little hands busy. They provide rich, multisensory learning experiences that build essential skills across all developmental domains. When approached with intention and enthusiasm, these simple activities create neural connections, develop physical abilities, and foster emotional well-being.
Perhaps most importantly, seasonal crafts help children develop a sense of connection—to the natural world, to family traditions, and to their own creative capabilities. These connections form the foundation for lifelong learning and appreciation of the changing world around them.
As you embark on your seasonal crafting journey with your preschooler, remember that the greatest value lies not in the perfect finished product, but in the joyful process of creating together. Each snip of the scissors, each fingerprint pressed to paper, each nature item collected is building not just a craft, but a child’s developing mind and heart.
What seasonal crafts have you tried with your preschooler? Share your experiences and photos in the comments below!