STEM Activities for Preschoolers: Simple Science Experiments That Wow
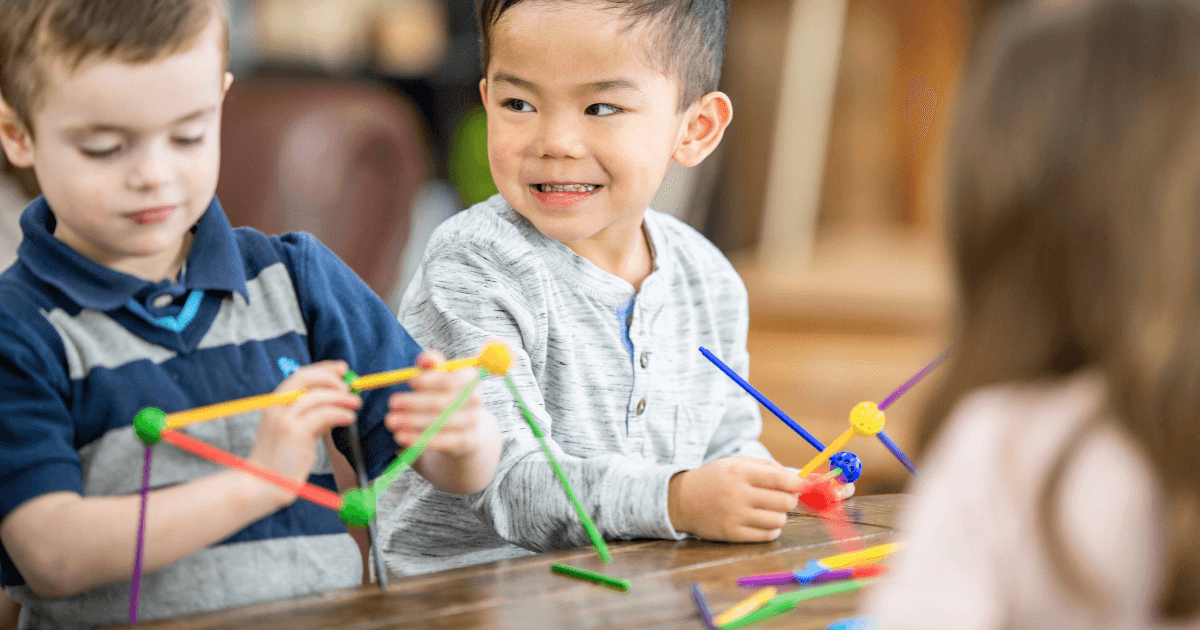
Ever seen your preschooler’s eyes light up with wonder? That magical moment when they discover something new about their world? That’s the power of STEM (Science, Technology, Engineering, and Math) in action!
As parents and educators, we know early exposure to STEM concepts builds critical thinking skills and nurtures natural curiosity. But let’s be honest—the idea of “teaching science” to 3-5-year-olds can feel overwhelming. Where do you start? What materials do you need? And how do you make complex concepts accessible to young minds?
Good news! You don’t need a laboratory or a science degree to introduce your little ones to the wonders of STEM. In fact, some of the most impactful science experiences for preschoolers use simple materials you already have at home.
In this article, I’ll share 15 simple yet jaw-dropping science experiments that will captivate your preschooler’s imagination while building a foundation for STEM learning. Each activity includes:
Easy-to-find materials
Simple step-by-step instructions
The “wow factor” that will amaze your little scientist
The science behind the magic (explained in preschooler-friendly terms)
Let’s dive into these accessible experiments that transform everyday moments into extraordinary learning opportunities!
Why STEM Matters for Preschoolers
Before we jump into the experiments, let’s talk about why early STEM exposure matters. According to the National Science Foundation, children who engage with STEM concepts before age 5 develop stronger problem-solving skills and show greater interest in STEM subjects later in life.
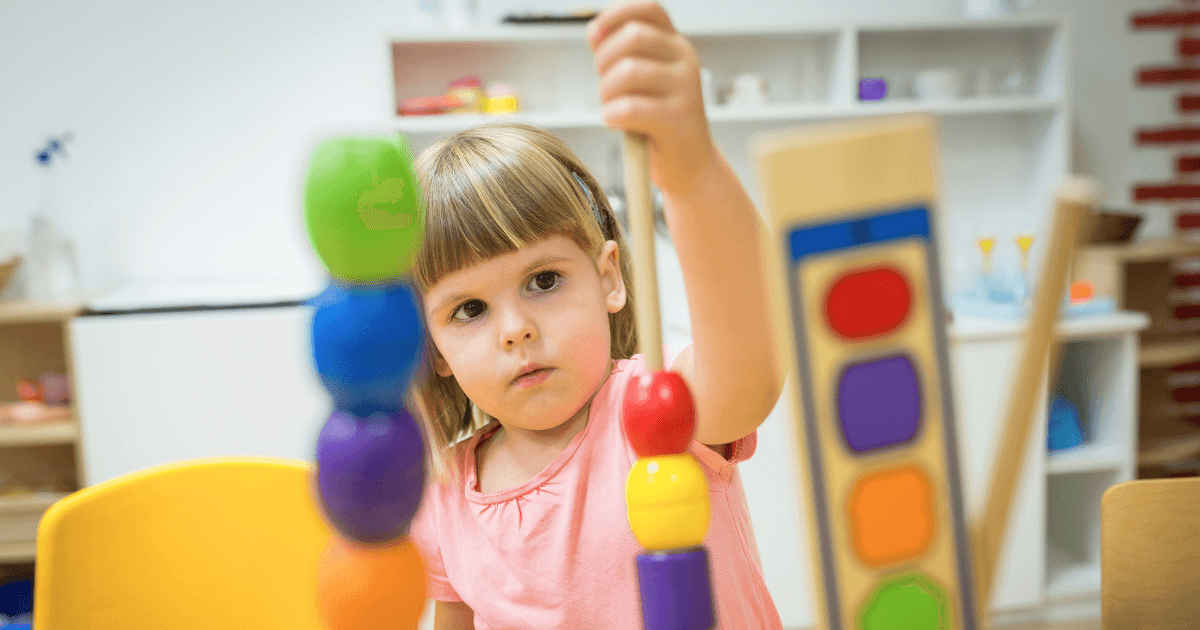
But here’s what’s really important: preschoolers are natural scientists! They’re constantly observing, questioning, and experimenting with their world. Our job isn’t to “teach” them science—it’s to provide opportunities that nurture their innate curiosity and help them make sense of what they observe.
As Dr. Rachel White, developmental psychologist and early childhood researcher, explains: “When preschoolers engage in hands-on STEM activities, they’re not just learning scientific facts—they’re developing critical thinking skills, building vocabulary, and gaining confidence in their ability to understand the world around them.”
Now, let’s get experimenting!
Water & Liquid Science Experiments
1. Walking Rainbow
Materials:
7 clear cups or jars
Paper towels
Food coloring (red, yellow, blue)
Water
The Wow Factor: Watch as water “walks” up paper towels and colors mix themselves to create a beautiful rainbow!
Instructions:
Arrange the cups in a row.
Fill alternate cups with water (1st, 3rd, 5th, and 7th).
Add red food coloring to the 1st cup, yellow to the 3rd, and blue to the 5th.
Fold paper towels lengthwise, then place one end in a cup of colored water and the other end in an empty cup.
Wait and watch the magic happen over several hours!
The Science: This experiment demonstrates capillary action—the ability of a liquid to rise against gravity in narrow spaces. The paper towel fibers act like tiny straws, pulling the colored water up and over into the empty cups. When different colors meet in the middle cups, they create new colors (red + yellow = orange, yellow + blue = green, etc.).
Preschooler-Friendly Explanation: “Water is like a tiny climber! It can climb up the paper towel even though it usually falls. When the different colored waters meet, they mix to make new colors—just like when you mix your paints!”
2. Magic Milk Explosion
Materials:
Shallow dish
Whole milk (works better than skim)
Food coloring (various colors)
Dish soap
Cotton swab
The Wow Factor: Watch colors dance, swirl, and explode across the surface of milk with just a touch of soap!
Instructions:
Pour enough milk to cover the bottom of a shallow dish.
Add drops of different food colors spread out across the surface.
Dip a cotton swab in dish soap.
Touch the soapy swab to the milk’s surface and watch the explosion of color!
The Science: Milk contains fat molecules and proteins. When dish soap is added, it breaks up the fat molecules, causing the milk to move. As the milk moves, it carries the food coloring, creating a swirling color explosion.
Preschooler-Friendly Explanation: “Milk has tiny bits of fat in it. Soap chases away the fat, making everything move around really fast. The colors are just going along for the ride!”
3. Ocean in a Bottle
Materials:
Clear plastic bottle with a cap
Water
Blue food coloring
Vegetable oil
Small shells, glitter, or tiny plastic fish (optional)
The Wow Factor: Create a portable, never-ending ocean wave that mimics the real thing!
Instructions:
Fill the bottle about 1/3 with water.
Add a few drops of blue food coloring and stir.
Add shells or glitter if desired.
Fill the rest of the bottle with vegetable oil, leaving a small air gap at the top.
Secure the cap tightly (you may want to hot-glue or super-glue it for safety).
Tip the bottle side to side and watch the waves form!
The Science: This experiment demonstrates density and immiscibility (when liquids don’t mix). Water is denser than oil, so it sinks to the bottom. The two liquids don’t mix because water molecules are polar (attracted to each other), whereas oil molecules are nonpolar.
Preschooler-Friendly Explanation: “Water and oil are like cats and dogs—they just don’t want to mix! The water is heavier, so it stays at the bottom. When you tip the bottle, the water moves like real ocean waves!”
Air & Pressure Experiments
4. Balloon Rocket Race
Materials:
String (about 10-15 feet)
Straws
Tape
Balloons
Clothespins or clips
The Wow Factor: Watch balloons zoom across the room on a string pathway!
Instructions:
Thread the string through a straw.
Tie the string between two points (like chairs or doorknobs).
Blow up a balloon, but don’t tie it—use a clothespin to keep the air in.
Tape the balloon to the straw on the string.
Remove the clothespin and watch the balloon rocket along the string!
The Science: This demonstrates Newton’s Third Law of Motion: for every action, there is an equal and opposite reaction. As air rushes out of the balloon in one direction, it propels the balloon in the opposite direction.
Preschooler-Friendly Explanation: “When air zooms out of the balloon, it pushes the balloon forward—just like when you let go of a balloon, and it flies around the room!”
5. Tornado in a Bottle
Materials:
Two plastic bottles of equal size
Water -Duct tape or a tornado tube connector
Glitter or food coloring (optional)
The Wow Factor: Create a spinning vortex that looks just like a tornado!
Instructions:
Fill one bottle about 2/3 full with water.
Add glitter or food coloring if desired.
Attach the second bottle to the top of the water-filled bottle (mouth-to-mouth) using duct tape or a tornado tube connector.
Flip the bottles so the water is in the top bottle.
Swirl the top bottle in a circle and watch a tornado form as water flows into the bottom bottle!
The Science: The swirling motion creates a vortex as air from the bottom bottle rises through the center while water from the top bottle flows down along the sides. This demonstrates centripetal force and fluid dynamics.
Preschooler-Friendly Explanation: “When you spin the water, it makes a tiny whirlpool. Real tornadoes are giant spinning air columns—just like our bottle tornado is a spinning water column!”
6. Magical Inflating Balloon
Materials:
Empty plastic bottle
Balloon
Baking soda (2-3 tablespoons)
Vinegar (1/4 cup)
Funnel
The Wow Factor: Watch a balloon inflate on its own without anyone blowing into it!
Instructions:
Using a funnel, pour the baking soda into the empty balloon.
Pour vinegar into the bottle.
Carefully stretch the balloon over the bottle opening to keep its contents from spilling in.
When ready for the reaction, lift the balloon to dump the baking soda into the vinegar.
Watch the balloon inflate!
The Science: When baking soda (sodium bicarbonate) and vinegar (acetic acid) mix, they create a chemical reaction that produces carbon dioxide gas. This gas fills the balloon, causing it to inflate.
Preschooler-Friendly Explanation: “Baking soda and vinegar have a special chemical reaction—they make an invisible gas called carbon dioxide. The gas needs space, so it fills up the balloon!”
Light & Color Experiments
7. Rainbow Prism
Materials:
Glass of water
White paper
Sunny day or flashlight
The Wow Factor: Create a rainbow on your wall using just water and light!
Instructions:
Fill a glass with water and place it on a table near a window that gets sunlight.
Position the glass so sunlight passes through it and onto a white surface (wall or paper).
Adjust the position until you see a rainbow appear!
Alternatively, use a flashlight in a darkened room.
The Science: This demonstrates light refraction and the visible light spectrum. Water bends (refracts) light, separating white light into its component colors—just like a prism or raindrops do to create rainbows in the sky.
Preschooler-Friendly Explanation: “White light is actually made up of all the colors mixed! The water helps break apart the light so we can see all the hidden colors inside.”
8. Color-Changing Flowers
Materials:
White carnations or daisies
Food coloring
Clear vases or cups
Water
Scissors
The Wow Factor: Watch flowers drink colored water and change color before your eyes!
Instructions:
Fill several cups with water.
Add different food coloring to each cup.
Trim flower stems at an angle under water.
Place one flower in each colored water cup.
Observe over 24 hours as the flowers change color!
For an extra experiment, split a stem lengthwise and place each half in different colored water.
The Science: This demonstrates capillary action and plant transpiration. The flowers draw water up through their stems to replace water lost through transpiration. The colored water travels up the stem and into the petals, changing their color.
Preschooler-Friendly Explanation: “Flowers drink water through their stems, just like you drink through a straw! The colored water travels all the way up to the petals, changing their color.”
9. Shadow Play Science
Materials:
Flashlight
Various objects
White wall or sheet
The Wow Factor: Create shadow art and learn about the properties of light!
Instructions:
Darken the room.
Set up a flashlight pointing at a blank wall or a hung sheet.
Place objects between the light and the wall to create shadows.
Experiment with moving objects closer to or further from the light source.
Try using translucent or transparent objects to see how light passes through.
The Science: This demonstrates how light travels in straight lines and how opaque objects block light to create shadows. It also shows how the shadow’s size changes with the object’s distance from the light source.
Preschooler-Friendly Explanation: “Light can’t bend around objects—it can only go through them or be blocked by them. When something blocks the light, it creates a shadow. Moving closer to the light makes your shadow bigger!”
Earth & Nature Experiments
10. Erupting Volcano
Materials:
Baking soda
Vinegar
Dish soap
Red food coloring
Small container (film canister or plastic cup)
Clay or playdough
Tray or dish (to contain mess)
The Wow Factor: Create a bubbling, fizzing volcanic eruption!
Instructions:
Place the small container on the tray.
Build a volcano shape around it using clay or playdough.
Add 1-2 tablespoons of baking soda to the container.
Add a few drops of red food coloring and a squirt of dish soap.
When ready to erupt, pour in vinegar and stand back!
The Science: This is the same acid-base reaction as the balloon experiment. The dish soap traps the carbon dioxide gas in bubbles, creating a foamy eruption.
Preschooler-Friendly Explanation: “Real volcanoes erupt when hot lava from deep in the Earth pushes up and out. Our volcano erupts when baking soda and vinegar mix to make a special gas that bubbles up and out!”
11. Growing Crystals
Materials:
3 cups water
1 cup Epsom salts
Food coloring (optional)
Clear jar
String
Pencil or stick
Paper clip or washer
The Wow Factor: Watch beautiful crystals grow overnight!
Instructions:
Heat water until very hot (adult supervision required).
Stir in Epsom salts until no more will dissolve.
Add food coloring if desired.
Pour the solution into a clear jar.
Tie one end of the string to a pencil and the other to a paper clip.
Place the pencil across the jar opening with the string hanging down into the solution.
Leave undisturbed overnight and observe crystal formation!
The Science: This demonstrates supersaturation and crystallization. The hot water can hold more dissolved salt than cool water. As the solution cools, the excess salt can no longer stay dissolved and forms crystals on the string.
Preschooler-Friendly Explanation: “Hot water can hold lots of invisible salt particles. When the water cools down, the salt particles find each other and stick together, forming beautiful crystals we can see!”
12. Seed Germination Viewer
Materials:
Clear plastic cup or jar
Paper towel
Bean seeds (lima beans work well)
Water
Spray bottle
The Wow Factor: Watch seeds sprout and grow roots and leaves before your eyes!
Instructions:
Roll a paper towel and place it inside the clear cup.
Place 3-4 bean seeds between the paper towel and the cup wall.
Spray the paper towel with water until damp, but not soaking wet.
Place in a sunny spot and spray with water daily to keep it moist.
Observe as seeds germinate over 3-7 days!
The Science: This demonstrates plant germination and growth. Seeds contain stored energy and a plant embryo. When provided with water and the right temperature, they begin germination, developing roots and shoots.
Preschooler-Friendly Explanation: “Seeds are like tiny sleeping plants with food packs! When they get water, they wake up and start growing roots to drink more water and leaves to catch sunlight.”
Physics & Motion Experiments
13. Magnetic Maze
Materials:
Paper plate
Marker
Small paper clip
Strong magnet
Construction paper
Tape
The Wow Factor: Move a paper clip through a maze without touching it!
Instructions:
Draw a maze on a paper plate.
Place the paper clip in the start position.
Hold the magnet underneath the plate.
Move the magnet to guide the paper clip through the maze!
The Science: This demonstrates magnetic fields and how they can work through other materials. The magnet’s invisible force field passes through the paper plate, attracting the metal paper clip.
Preschooler-Friendly Explanation: “Magnets have invisible powers that can reach through things! The paper clip is made of metal, so it’s attracted to the magnet even when the plate is between them.”
14. Ramp Races
Materials:
Cardboard pieces or foam board
Books or blocks (to prop up ramps)
Various small toys with wheels (cars, marbles, etc.)
Measuring tape
Stopwatch (optional)
The Wow Factor: Test different ramp heights and surfaces to see what makes things roll fastest!
Instructions:
Create ramps by propping cardboard against books or blocks.
Set up different heights or cover ramps with different materials (foil, wax paper, fabric).
Release cars or marbles from the top of each ramp.
Measure how far they travel or time how long it takes them to go.
Chart the results!
The Science: This demonstrates gravity, friction, and momentum. Steeper ramps increase the acceleration due to gravity, while different surfaces create varying amounts of friction, affecting speed.
Preschooler-Friendly Explanation: “Gravity pulls things down the ramp. Steeper ramps make things go faster because gravity pulls harder! Some surfaces are slippery and let things roll really fast, while bumpy surfaces slow things down.”
15. Sink or Float Prediction Chart
Materials:
Large, clear container of water
Various small objects (cork, marble, crayon, plastic toy, coin, etc.)
Paper and markers to create a prediction chart
The Wow Factor: Discover surprising results as you test whether objects sink or float!
Instructions:
Create a simple chart with pictures/names of objects and “sink” or “float” columns.
Have your preschooler predict whether each object will sink or float.
Test each object by placing it in water.
Record the actual results and compare with predictions.
Discuss why some objects float while others sink.
The Science: This demonstrates density. Objects that are less dense than water float, while objects that are denser than water sink. It’s not about size or weight alone, but rather the relationship between an object’s weight and volume.
Preschooler-Friendly Explanation: “Things float when they’re lighter for their size than water. Things sink when they’re heavier than water for their size. It’s like how a huge ship can float even though it’s very heavy!”
Making STEM Learning Stick
These experiments are more than just fun activities—they’re powerful learning opportunities. Here are some tips to maximize the STEM learning potential:
Ask Open-Ended Questions
Instead of explaining everything right away, try asking questions like:
“What do you think will happen if…?”
“What do you notice about…?”
“Why do you think it did that?”
“What would happen if we changed…?”
These questions encourage critical thinking and help children develop their own hypotheses—just like real scientists!
Document the Process
Create a simple science journal with your preschooler:
Draw pictures of the experiment setup
Record predictions
Note observations
Compare results with initial guesses
This practice introduces the scientific method in an age-appropriate way. According to the Early Childhood Education Journal, children who document their scientific explorations show better recall and understanding of concepts.
Connect to Real-World Examples
Help your child see how each experiment connects to the world around them:
Link the rainbow prism to actual rainbows after rain
Connect the tornado bottle to weather events
Relate the magnetic maze to how a compass works
These connections help children understand that science isn’t just something that happens in experiments—it’s everywhere in their daily lives!
Follow Your Child’s Lead
While these experiments are structured, be open to your child’s questions and ideas. If they want to try a variation or have a different hypothesis, encourage their curiosity! Some of the best learning happens when children take ownership of the exploration process.
Safety First!
While these experiments are designed to be preschooler-friendly, adult supervision is essential. A few safety tips:
Always supervise experiments, especially those involving water or small objects
Discuss proper handling of materials before starting
Store chemicals like vinegar and baking soda out of reach when not in use
Adapt experiments based on your child’s developmental level
Beyond the Experiments: Building a STEM Mindset
These 15 experiments are just the beginning of your preschooler’s STEM journey. The real goal isn’t just to complete activities but to nurture a STEM mindset—a way of thinking that embraces curiosity, problem-solving, and discovery.
Dr. Elizabeth Rood, Director of the Center for Childhood Creativity, explains: “Early STEM experiences help children develop a growth mindset—the understanding that abilities can be developed through dedication and hard work. This foundation is crucial not just for future STEM learning, but for approaching any challenge with confidence.”
So when your preschooler asks those endless “why” questions or wants to take apart a toy to see how it works, they’re not just being curious—they’re developing their STEM mindset!
Resources for Continued Exploration
Ready to continue the STEM journey with your preschooler? Check out these resources:
The Exploratorium provides science activities for all ages
Final Thoughts
Remember, perfect results or flawless explanations don’t measure the success of STEM experiences for preschoolers. They’re measured by engagement, excitement, and the spark of curiosity in your child’s eyes.
So when the baking soda volcano makes a mess, or the crystal-growing experiment doesn’t turn out exactly as planned, that’s okay! The process of exploration and discovery is what matters most. Each experiment—successful or not—is building your child’s confidence as a scientist, engineer, mathematician, and thinker.
Which experiment will you try first? Share your experiences in the comments below, and let us know what other STEM activities your preschooler enjoys!